How to Conduct a Video Inspection
Follow the steps below to start a video inspection, invite attendeess, capture evidence, and generate a report.
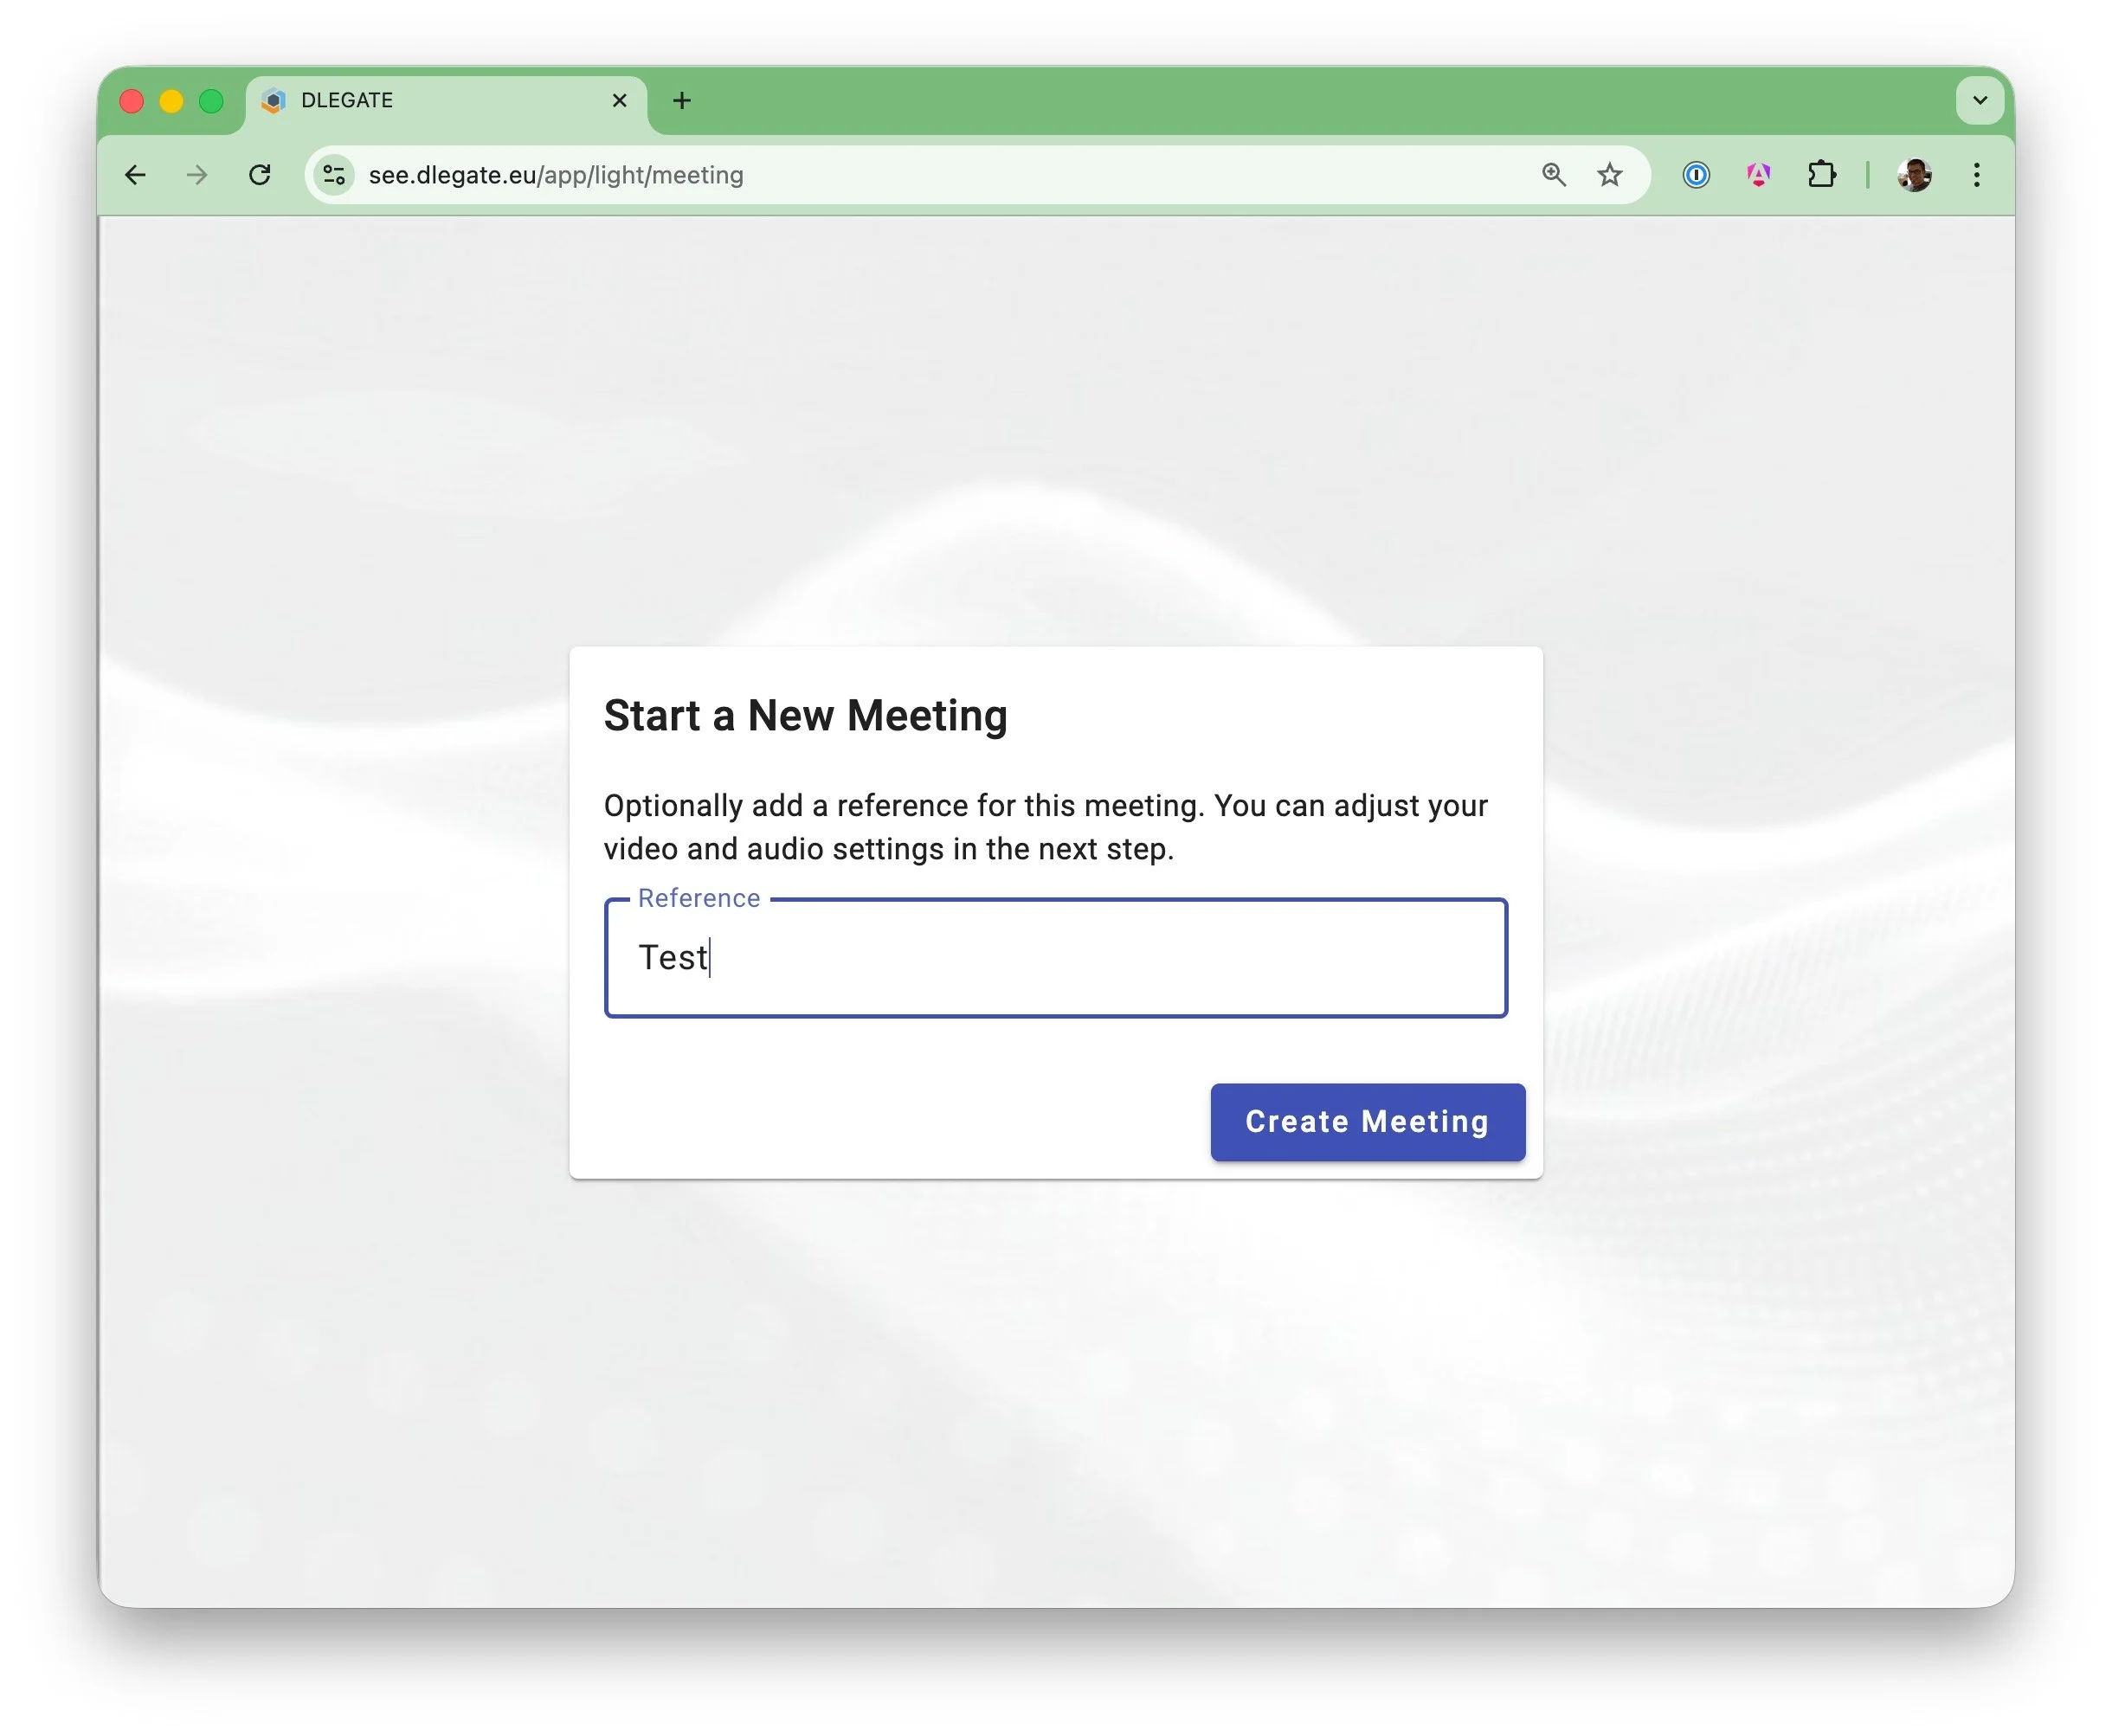
1Start a New Meeting
Create a new inspection session to begin the remote video call.
Optionally add a reference name (for example a claim number or customer name) to help organize your sessions.
- Enter an optional session reference
- Click Create Meeting to start the session
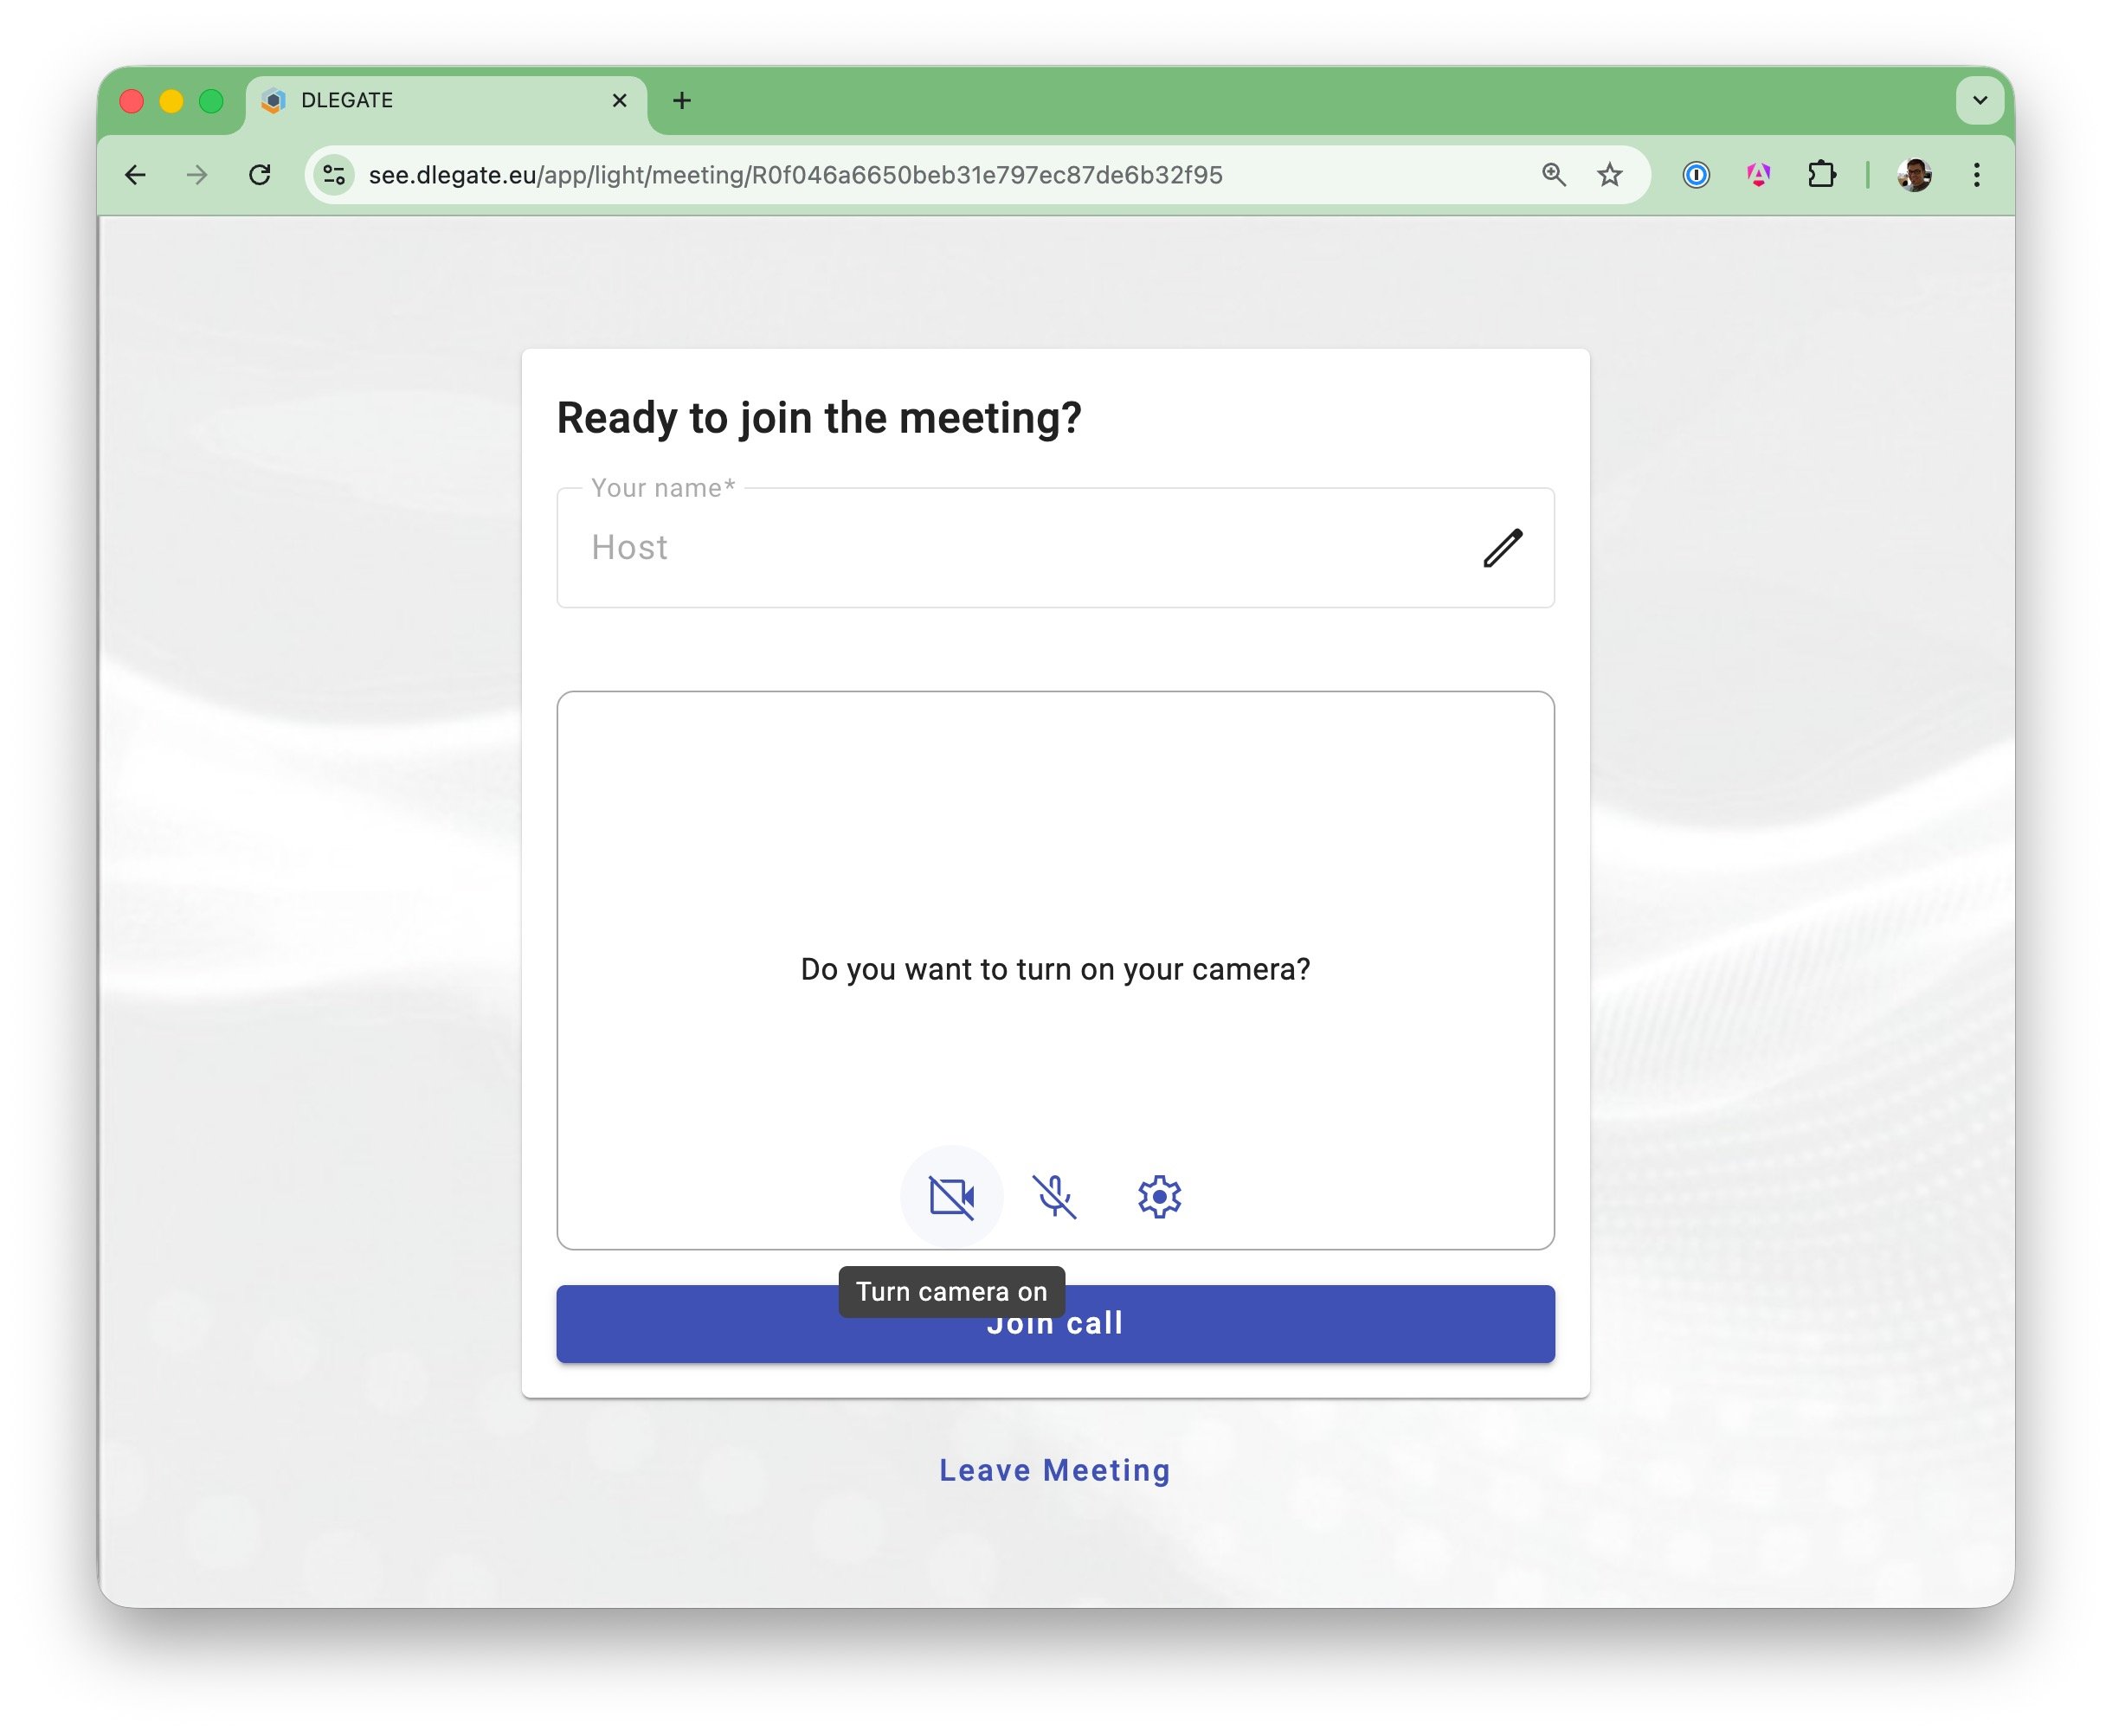
2Enter the Lobby
Before joining the session, confirm your display name and check your camera and microphone settings.
- Enable or disable camera and microphone
- Open Settings to select camera and audio
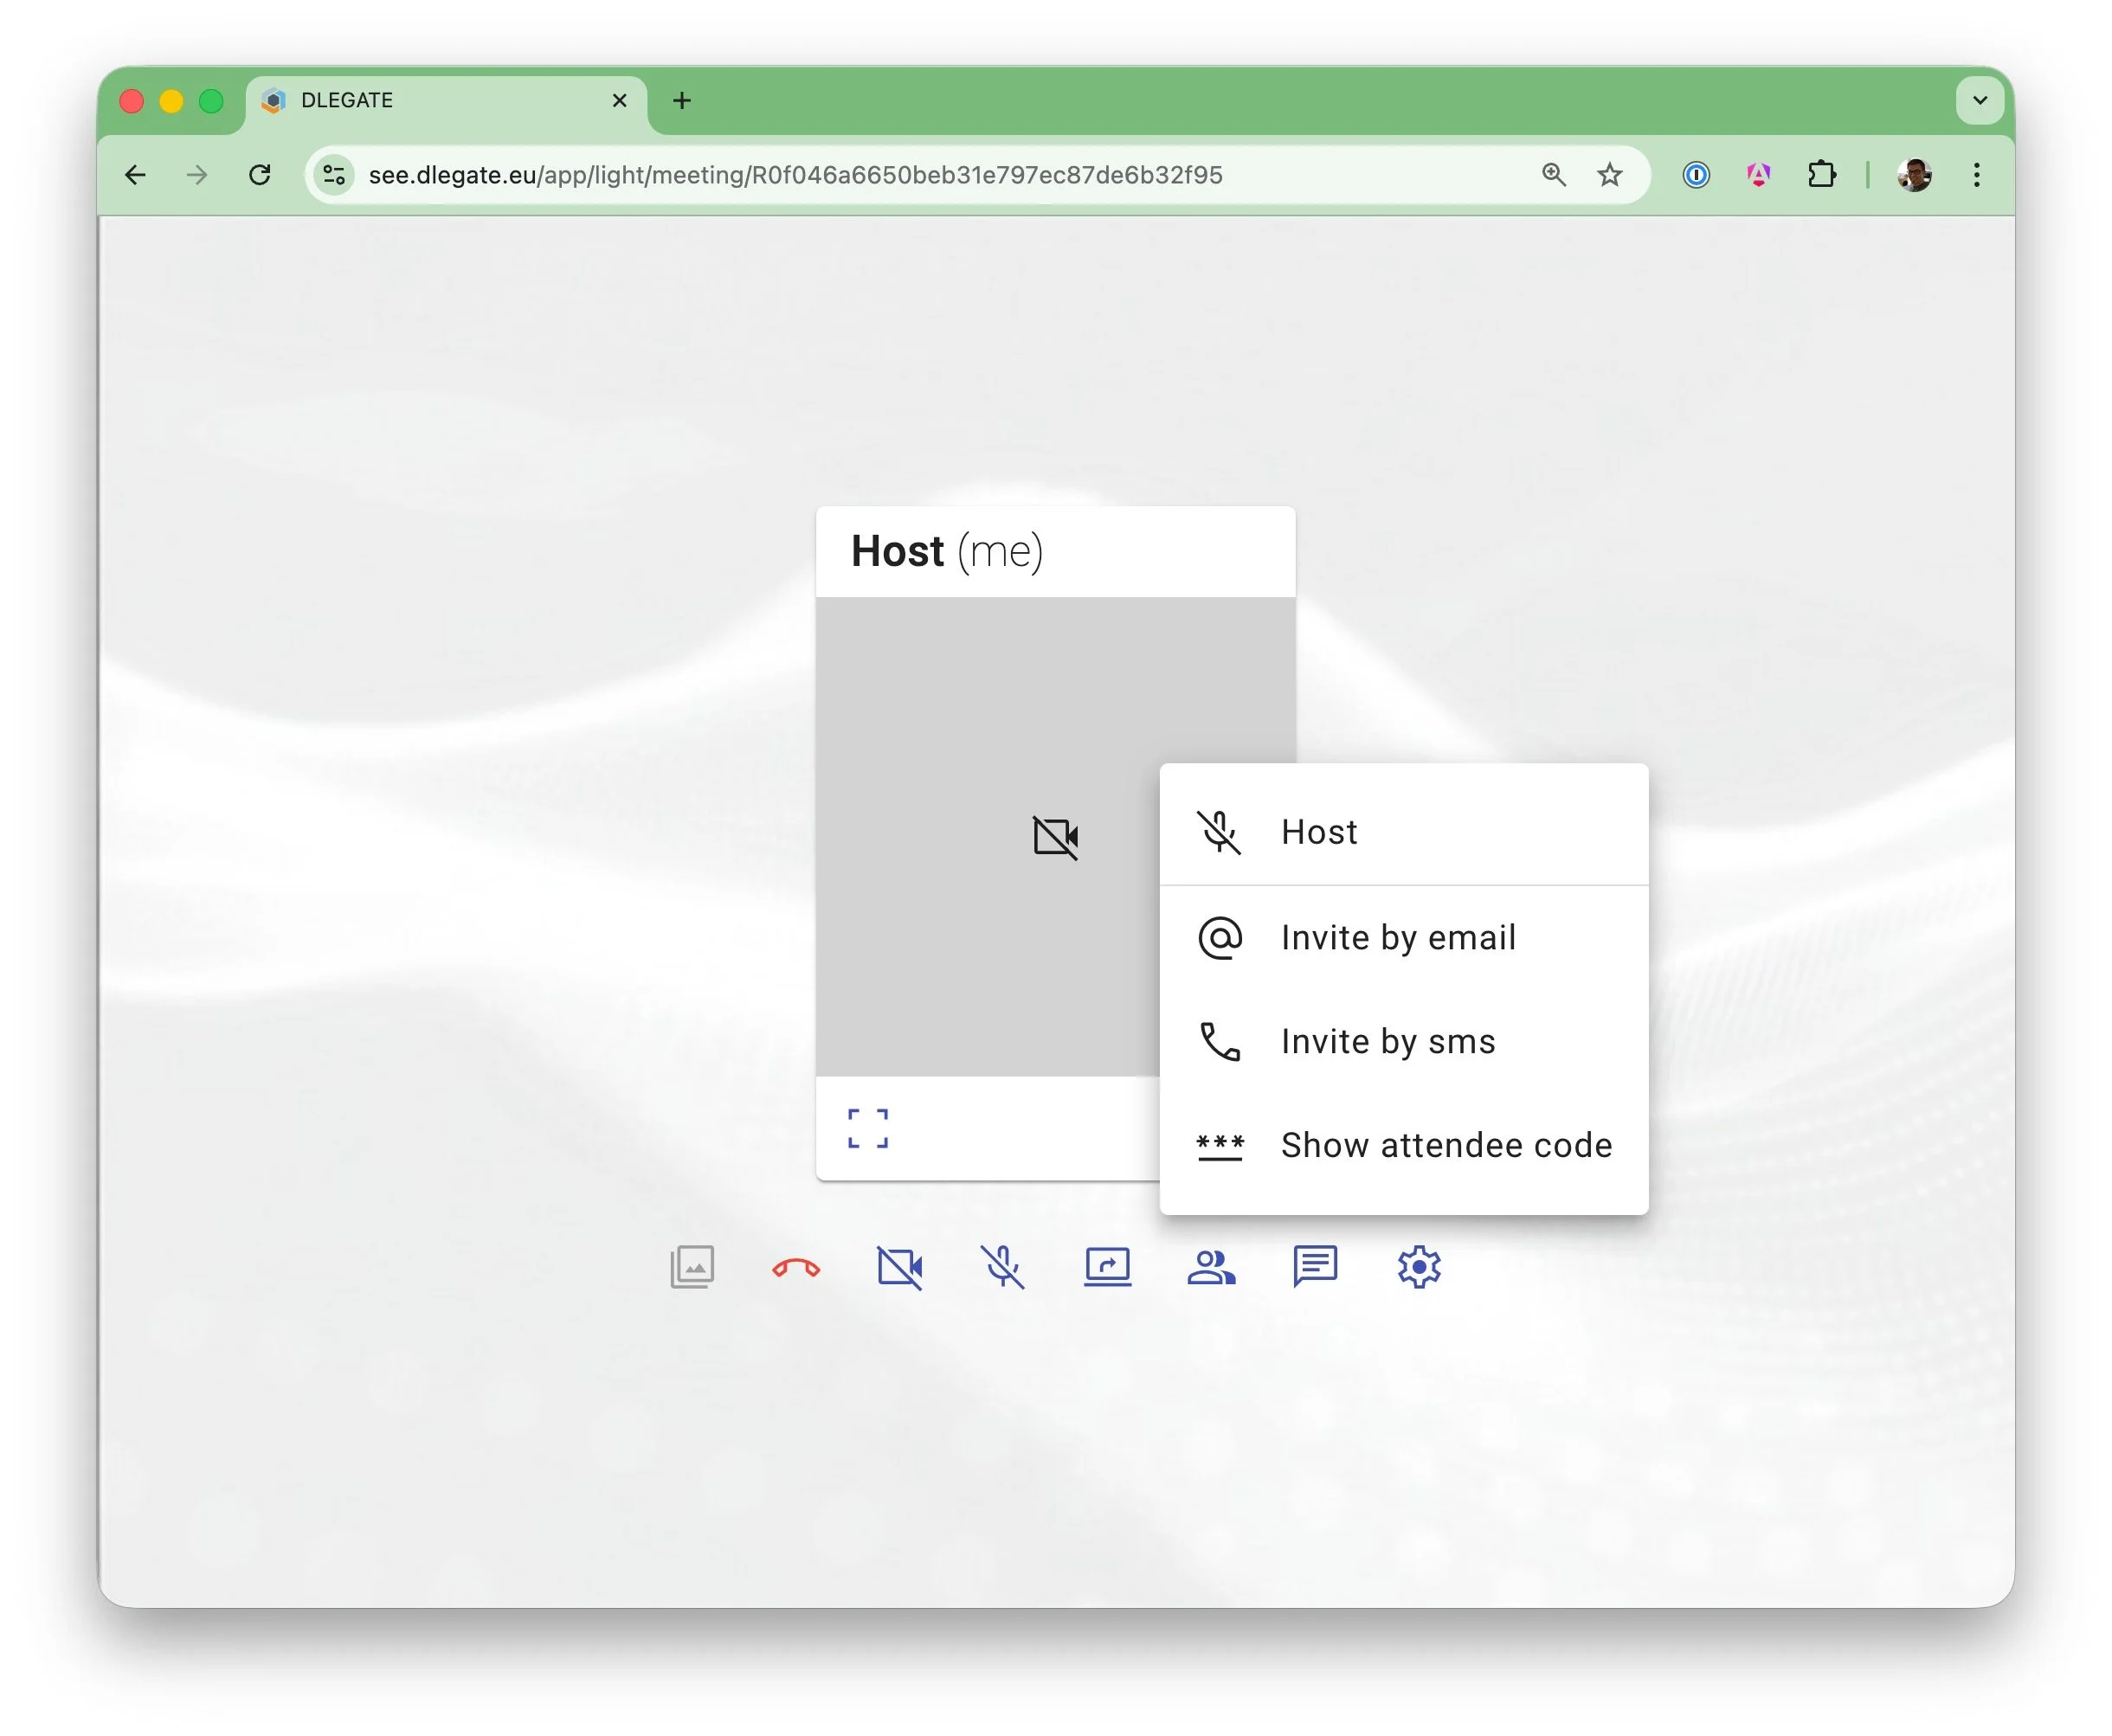
3Invite Attendees
As the host, open the Attendees menu to invite others. Send SMS or Email invitations with a secure join link, or have participants join via the session PIN on the general join page.
- Send instant SMS or Email invitations with a secure join link
- Share the session PIN for participants joining via the general join page
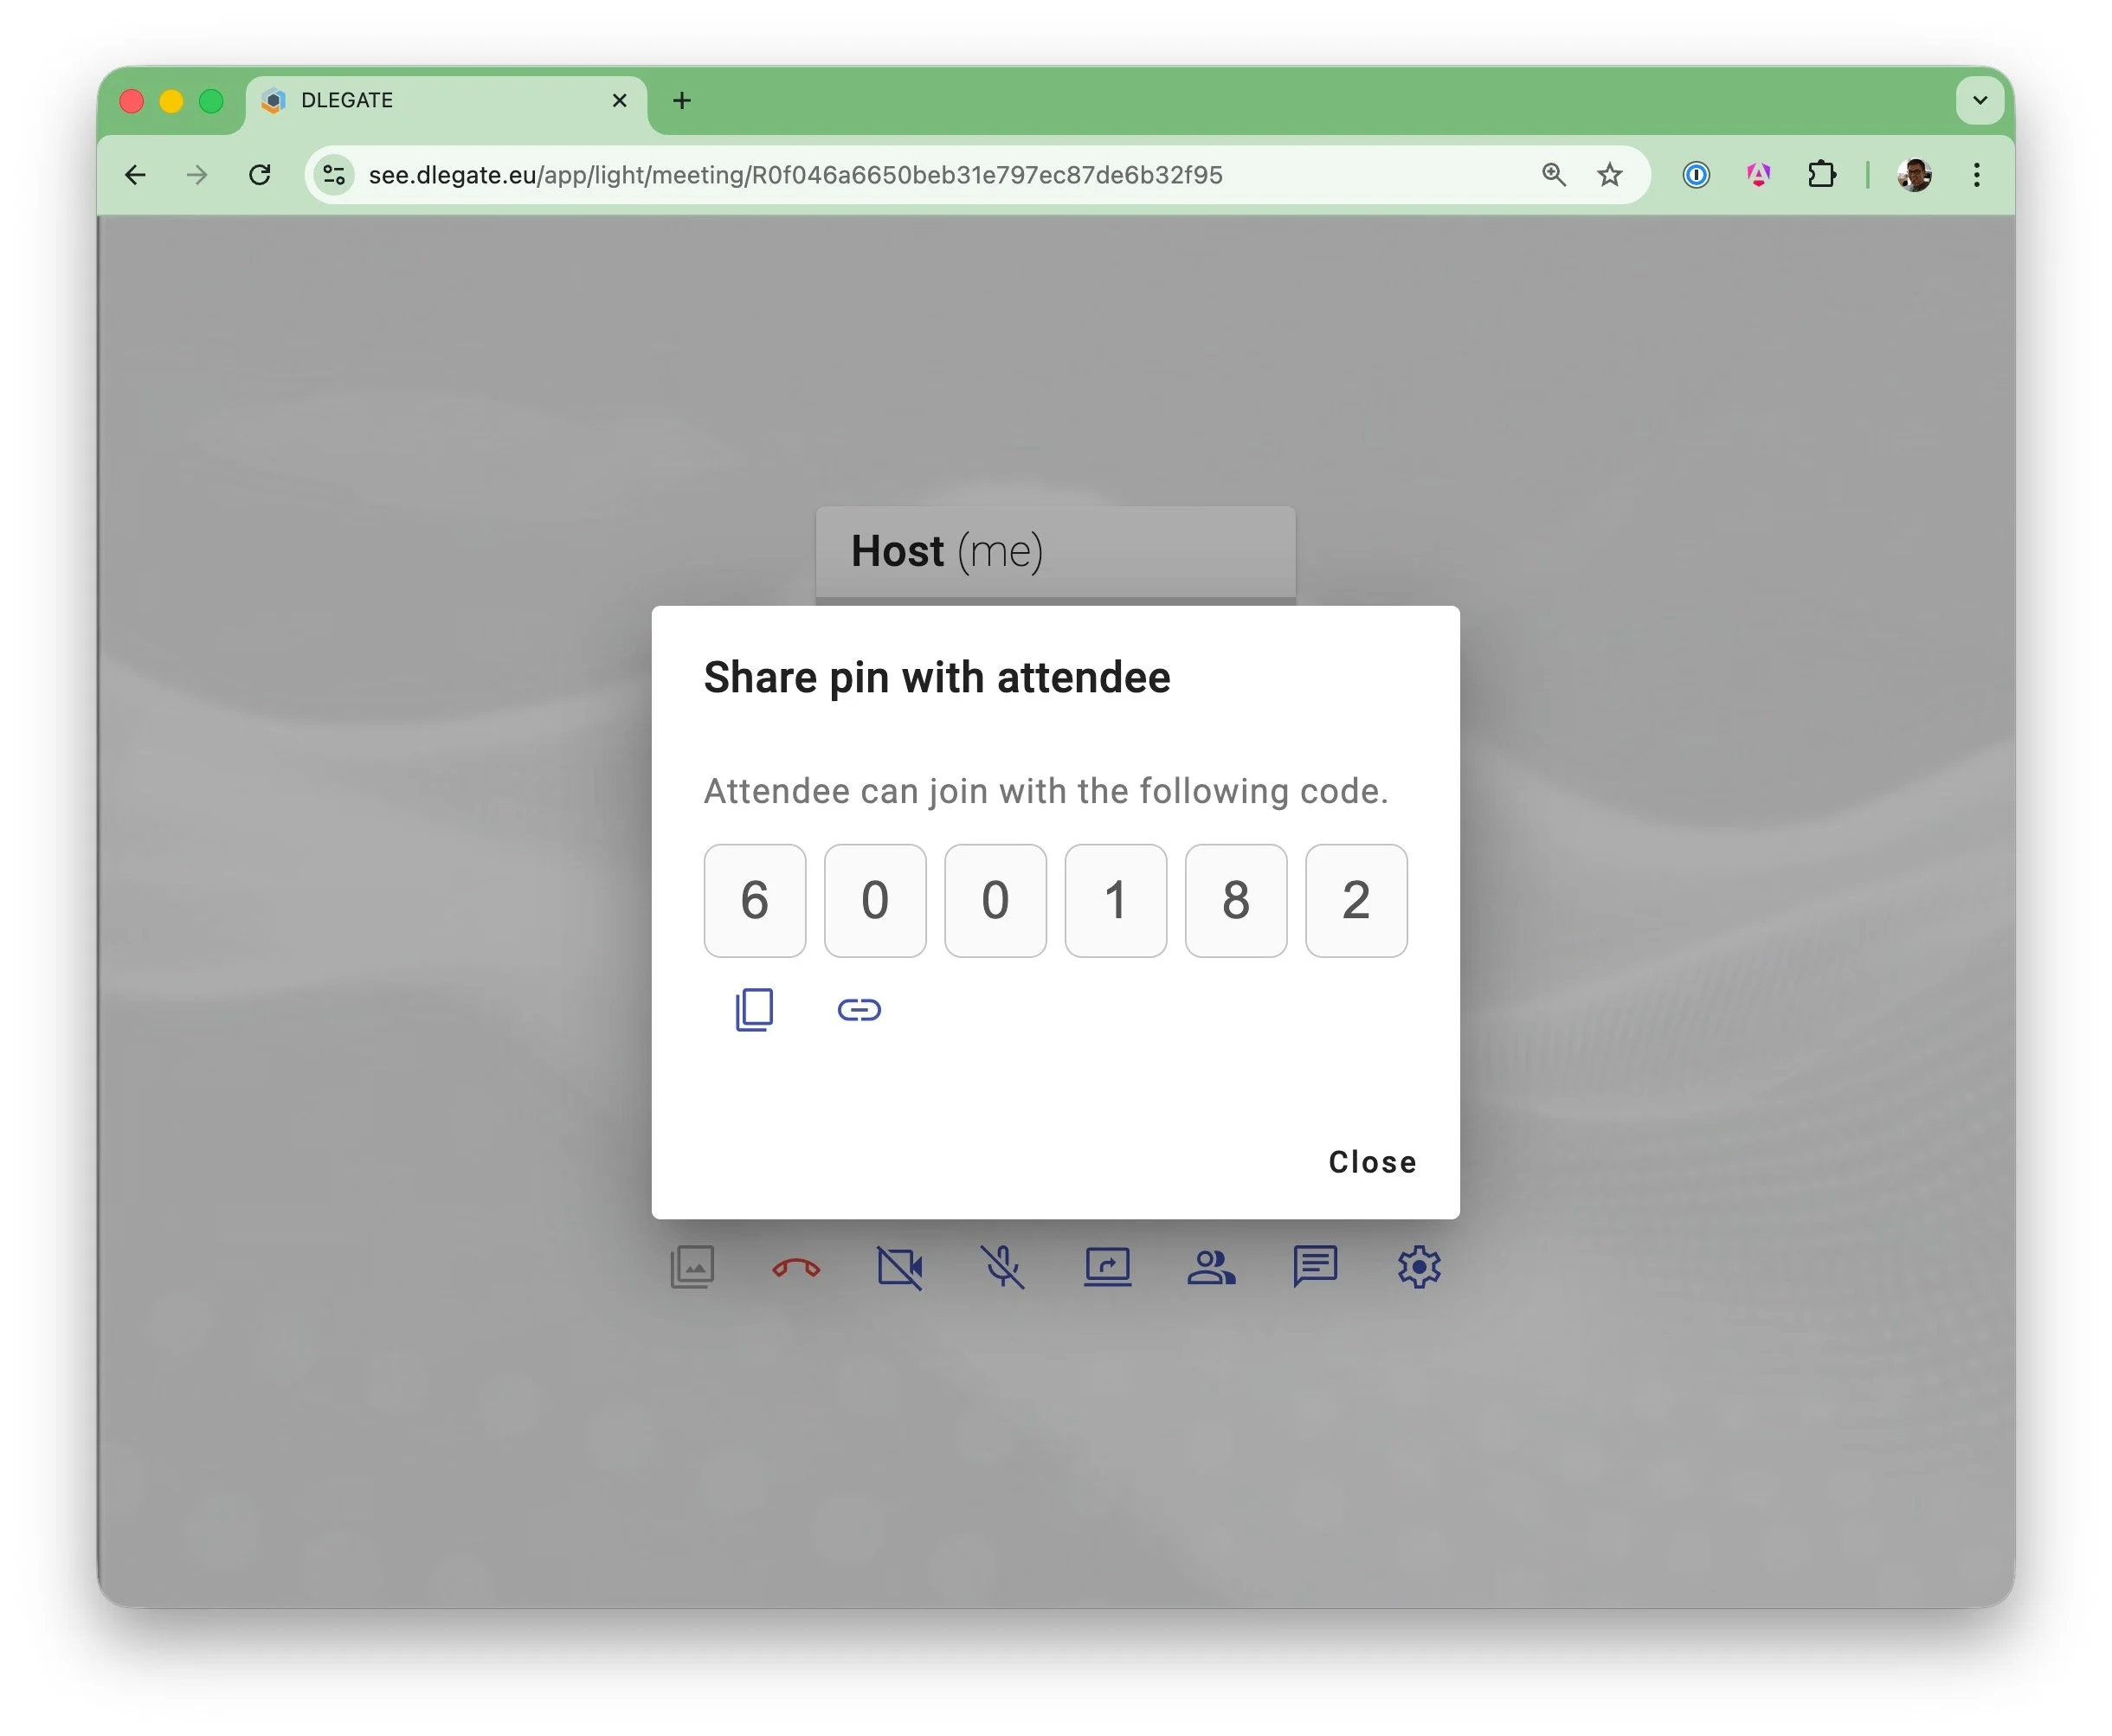
4Share the Join Details
You can also share access to the meeting manually. Copy the secure session link or provide the 6-digit session PIN so attendees can join your inspection.
- Copy and share the secure meeting link
- Provide the session PIN for access via the general join page
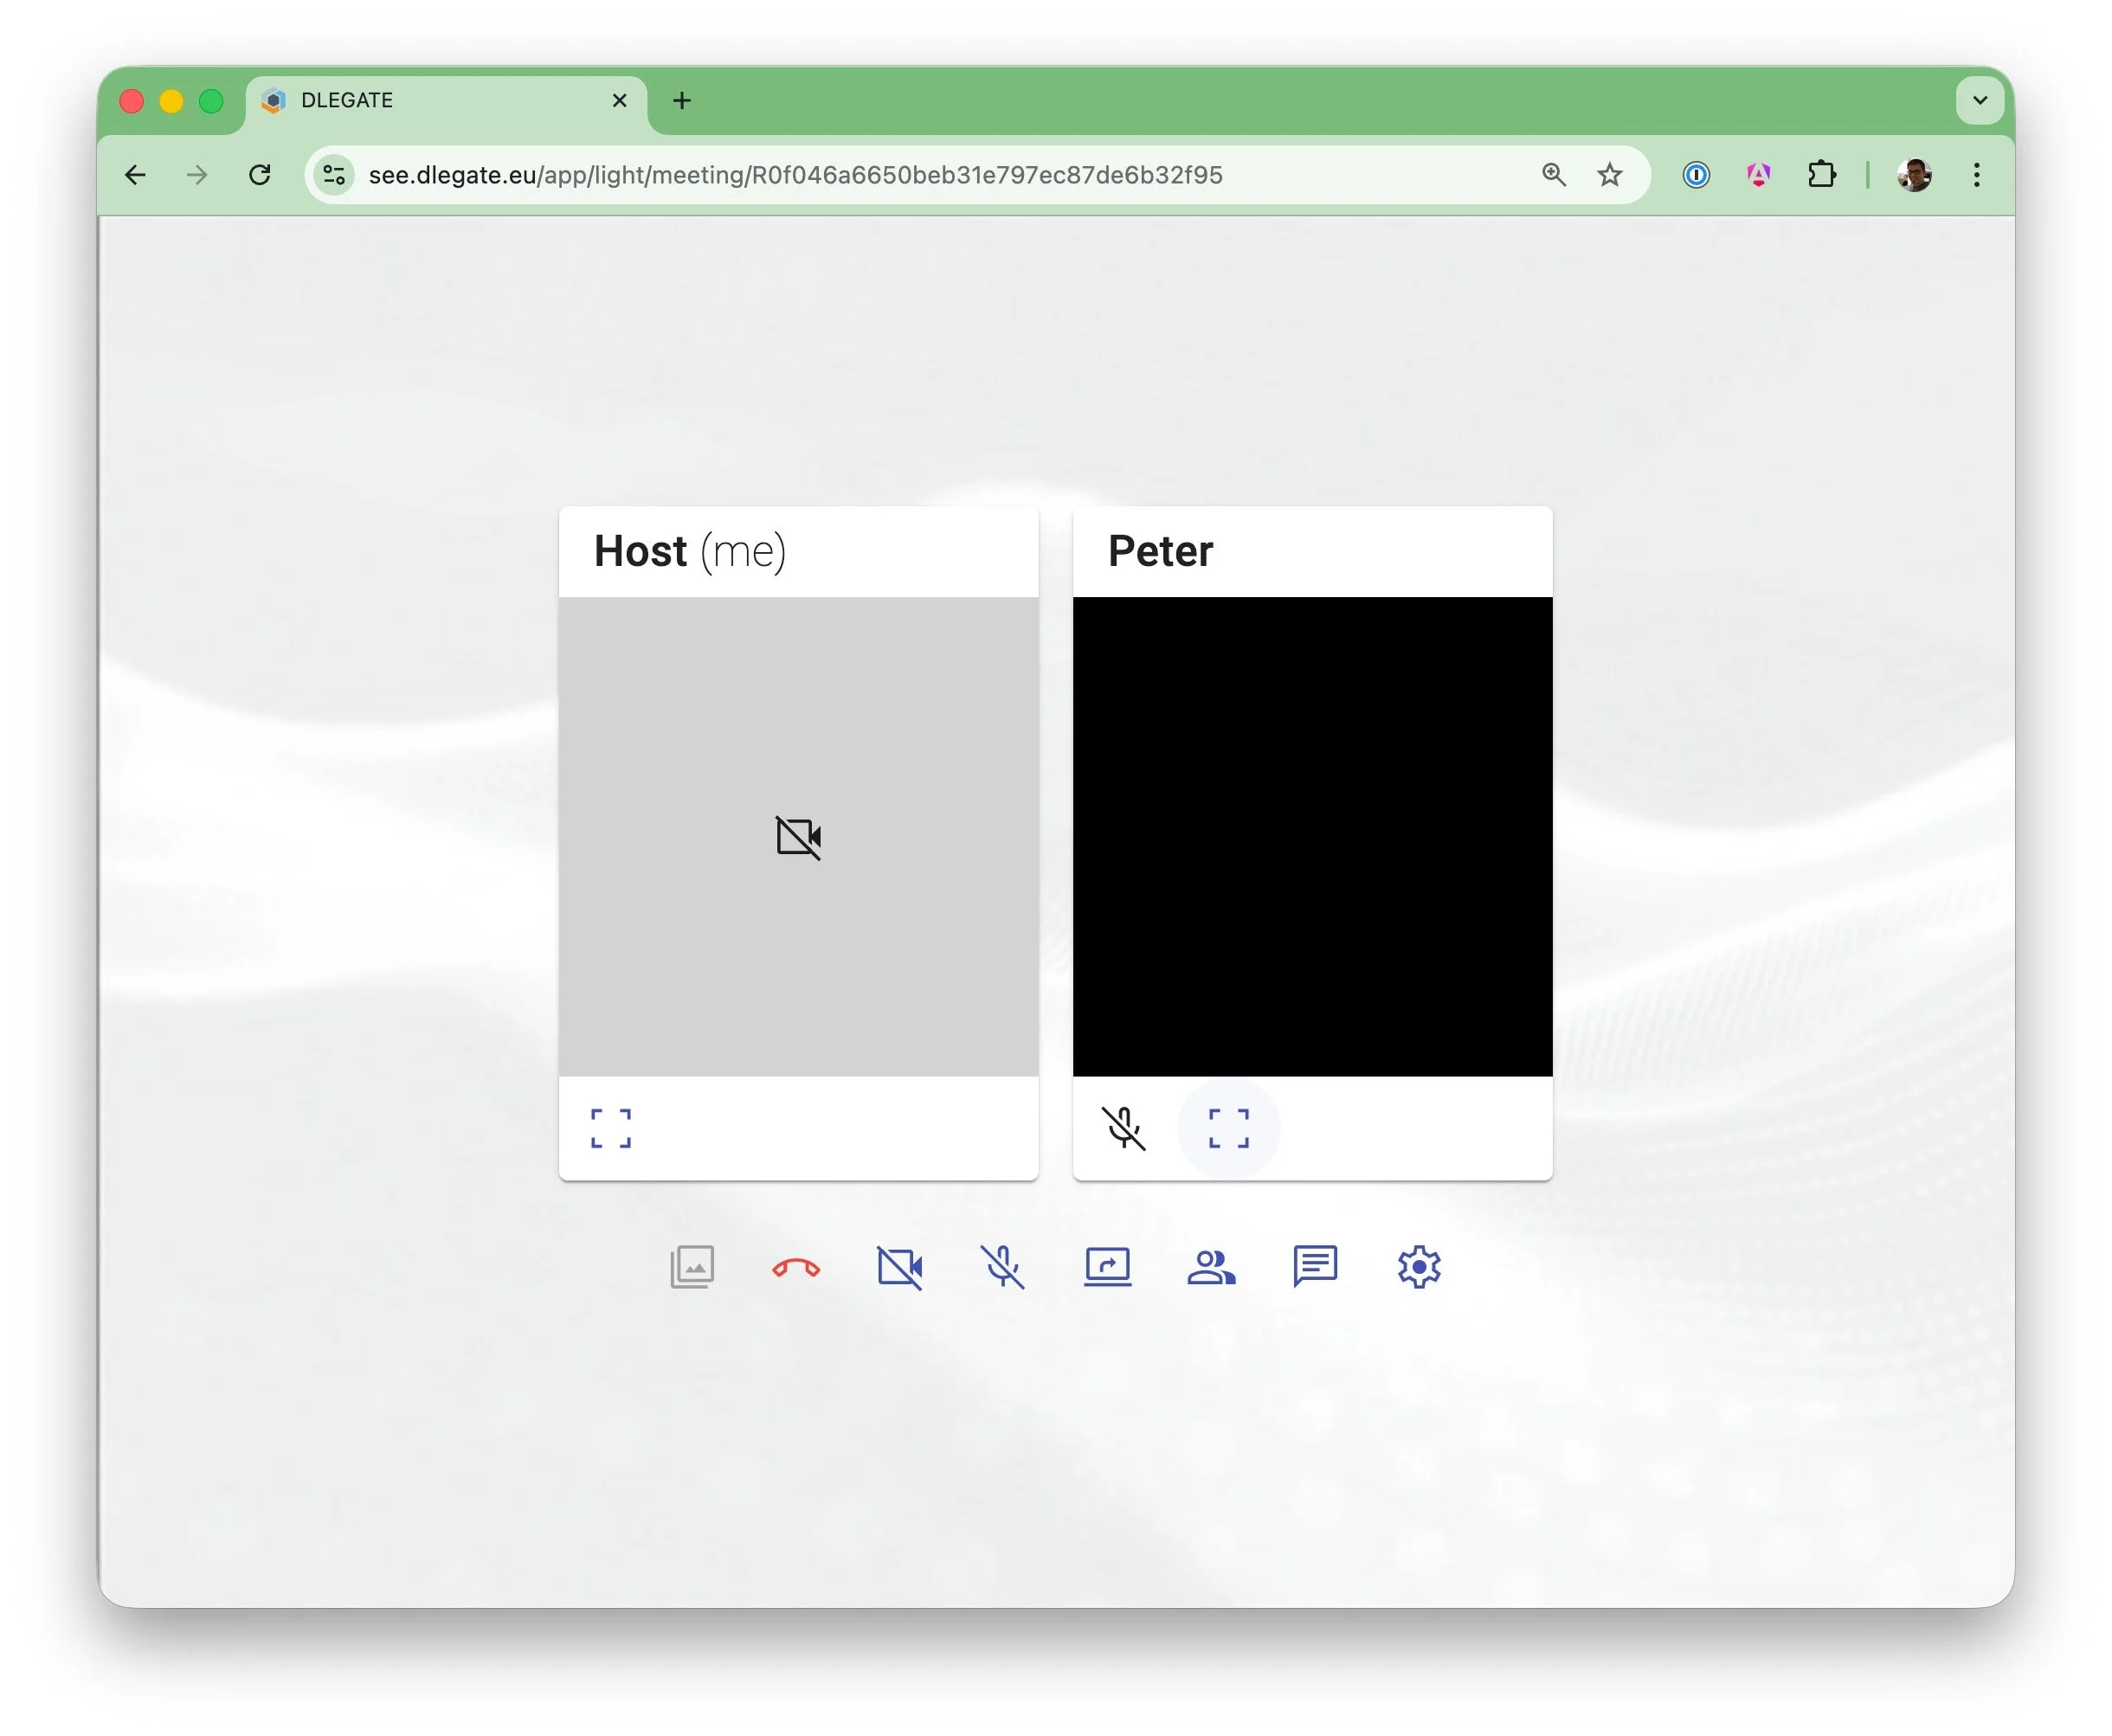
5Connect with Video
When the attendee opens the join link from the SMS or Email invitation, they are connected directly to the meeting. As the host, you will see their camera stream appear alongside your own video preview.
- Attendees join instantly via the secure meeting link
- The remote camera stream appears automatically once they connect
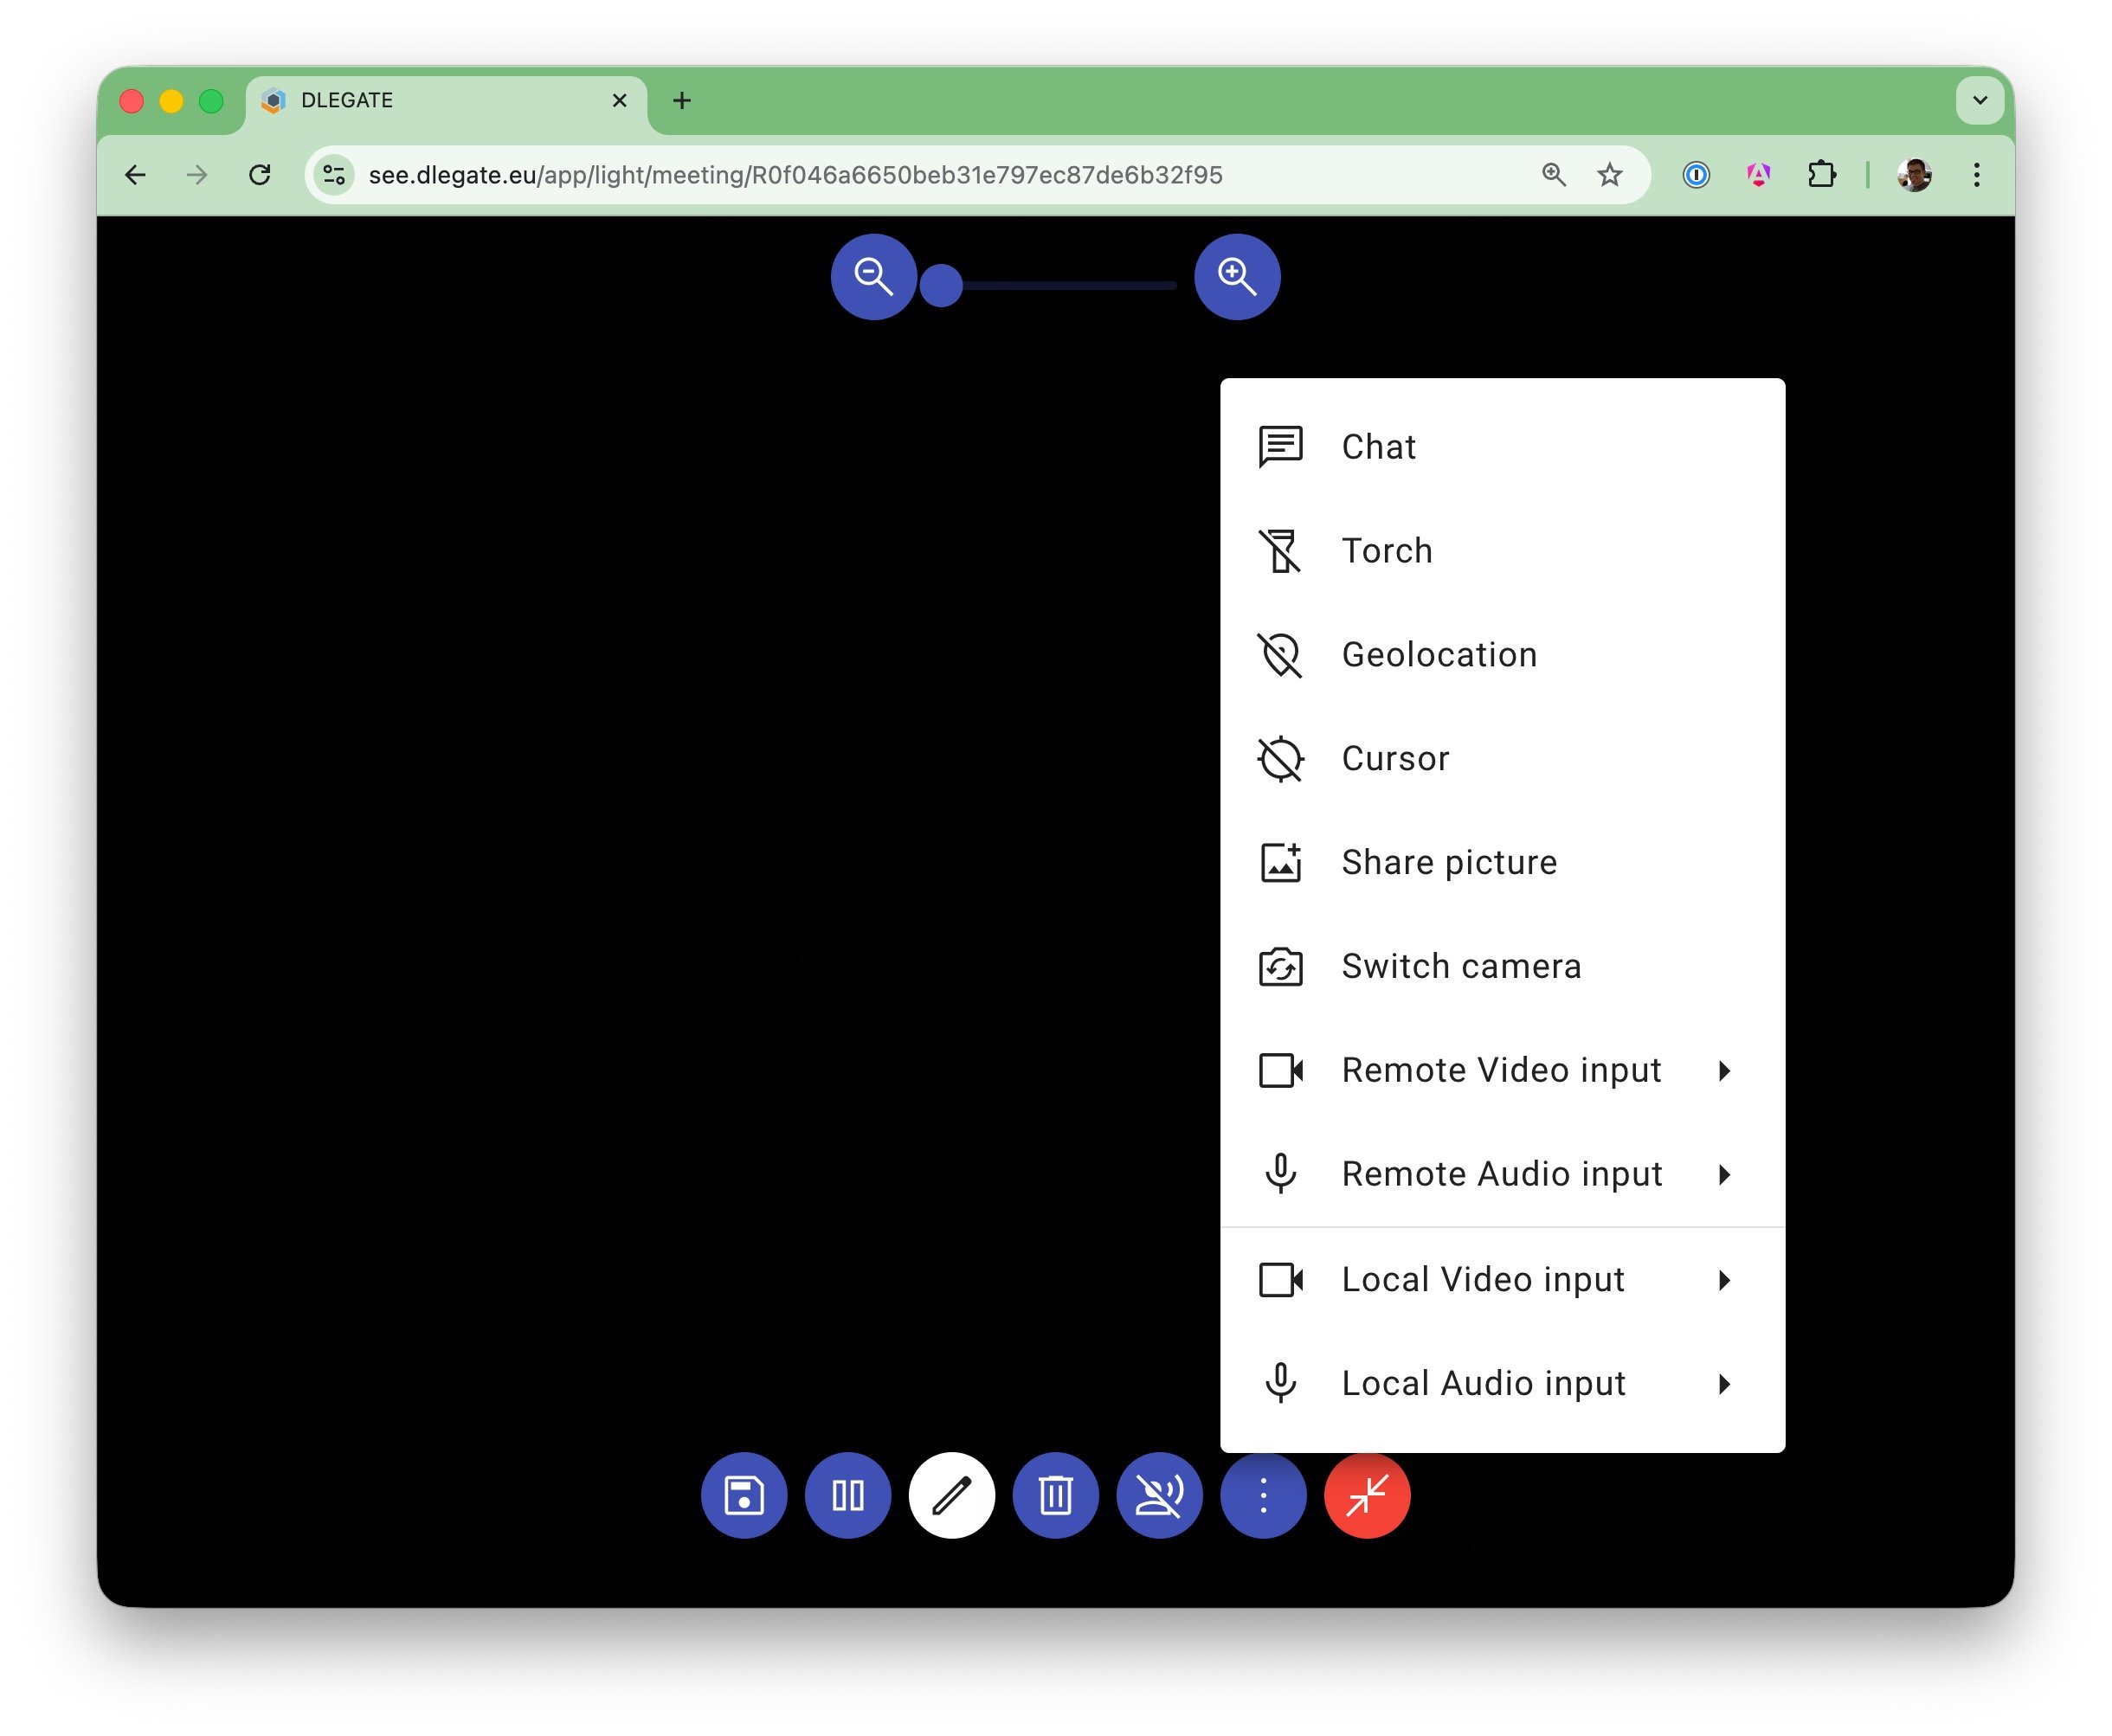
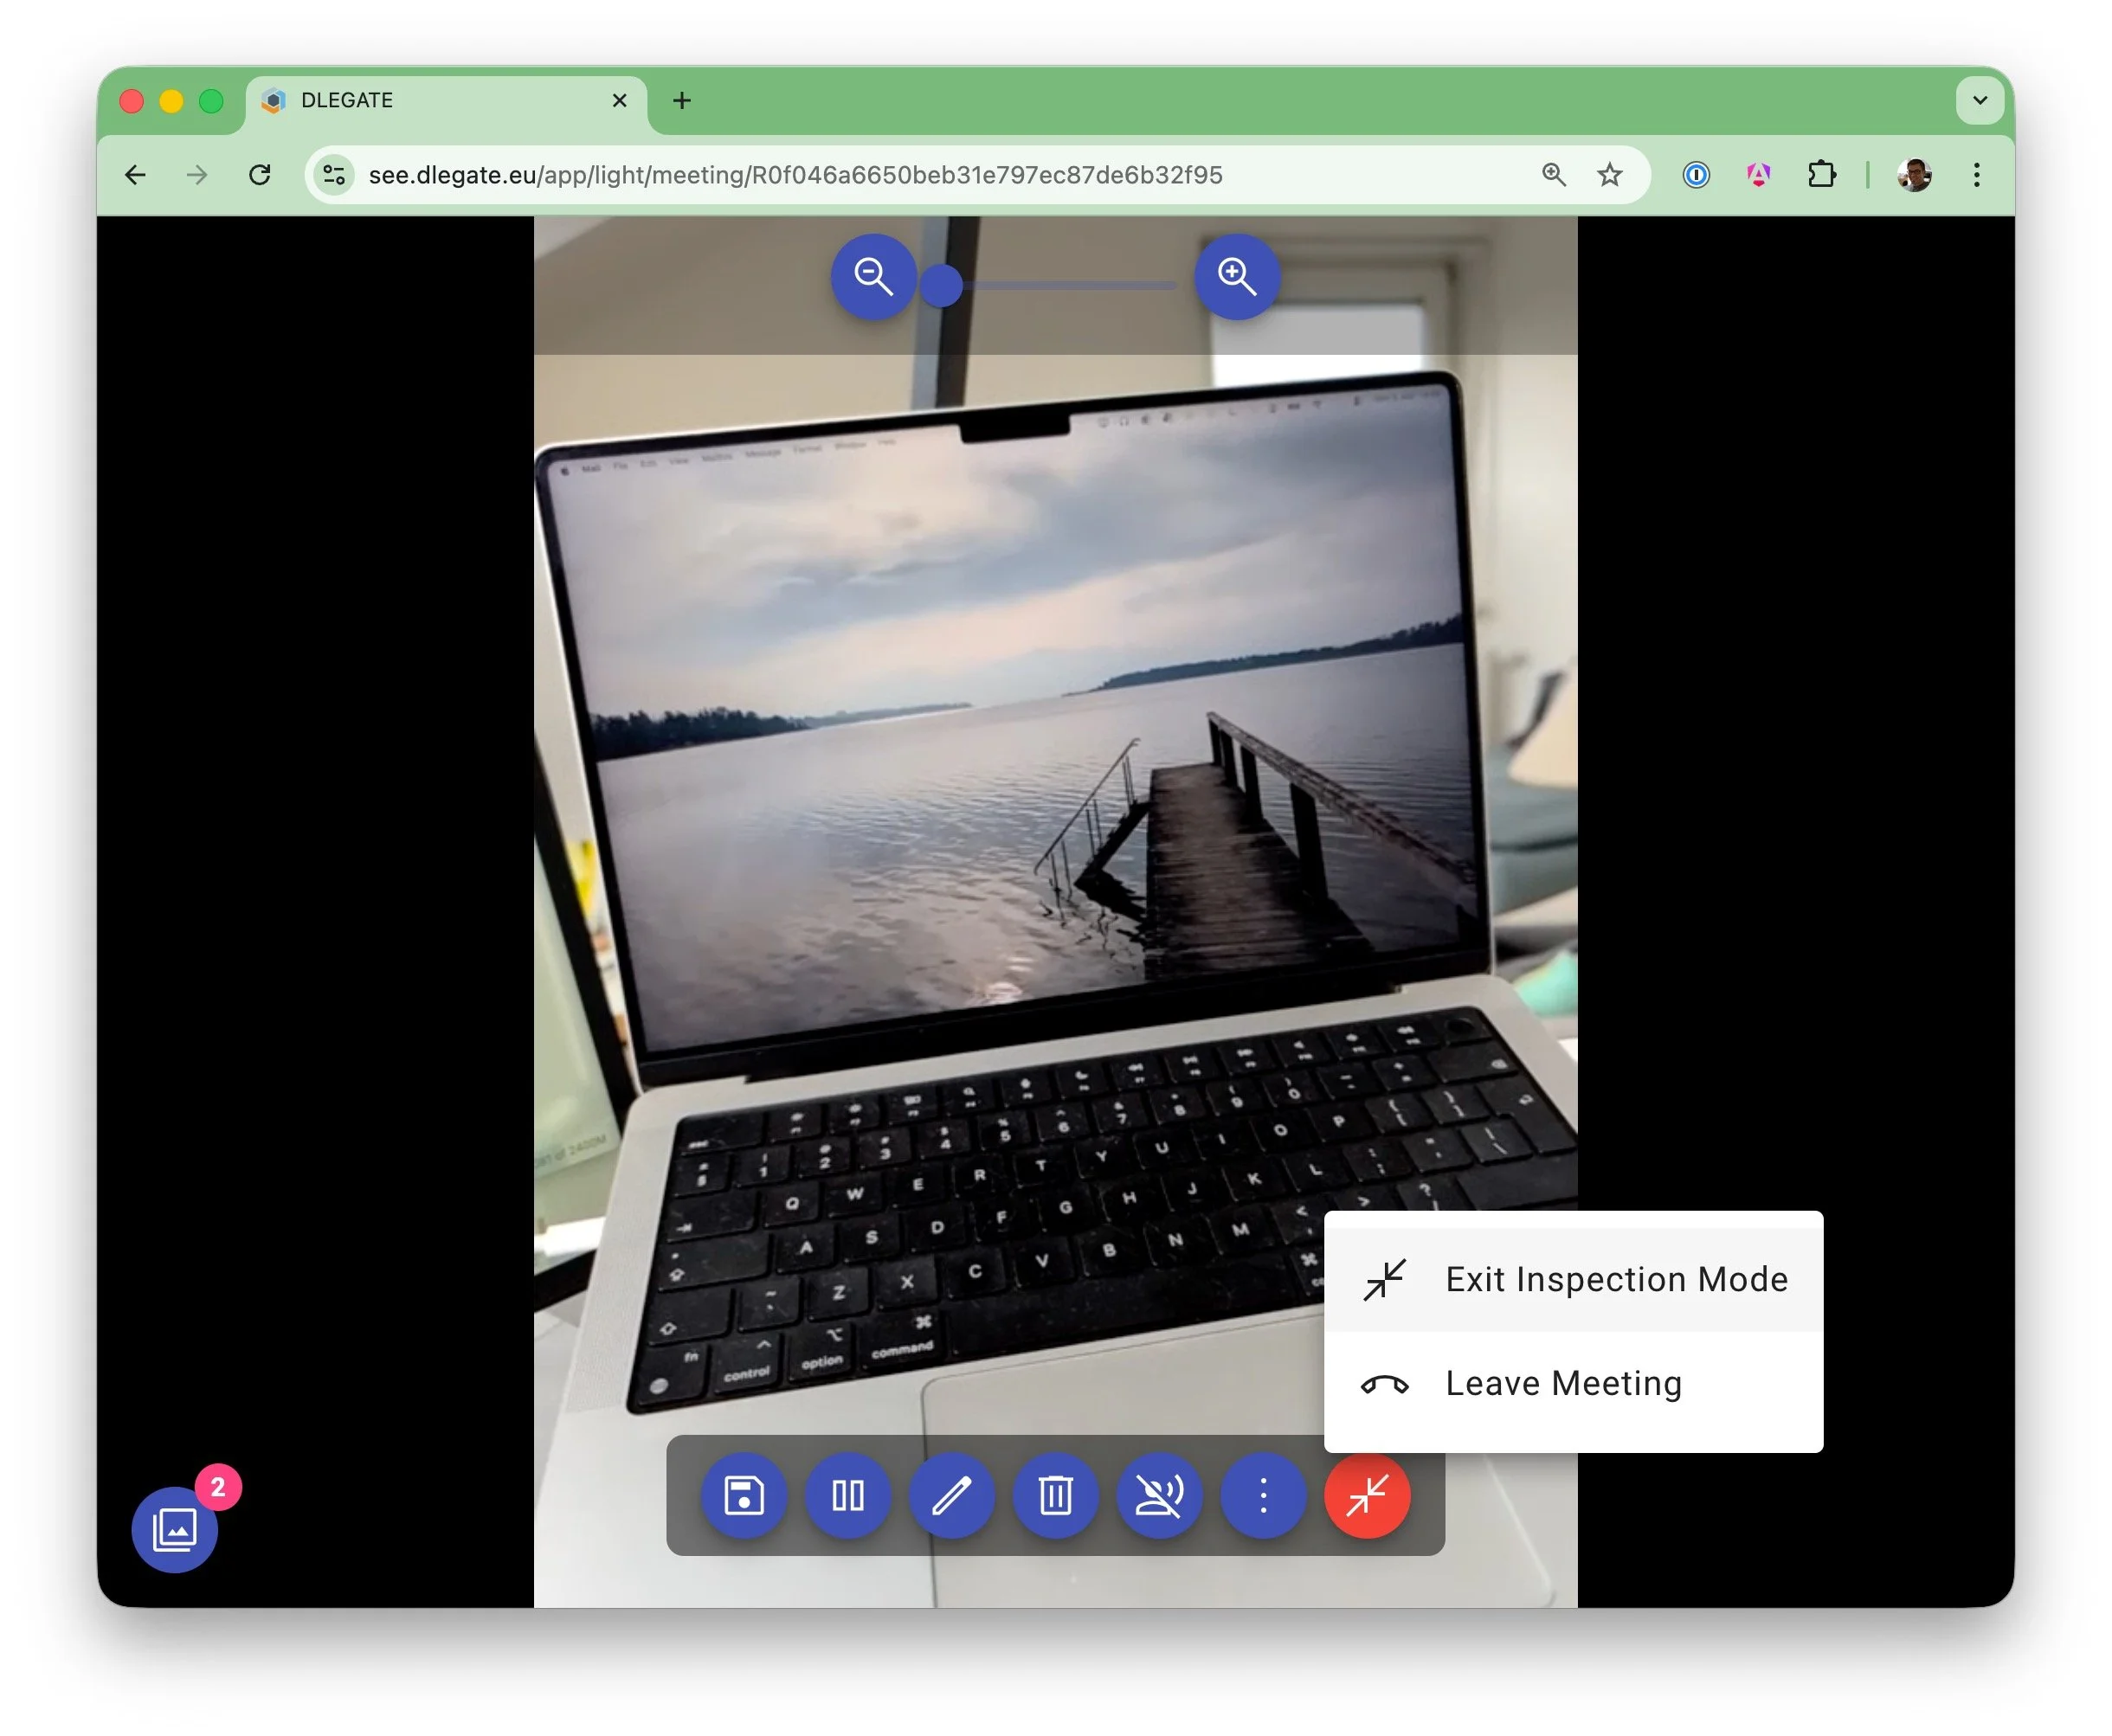
6Start Inspecting
Once the participant has joined, switch to inspection mode and guide the remote camera.
- Control the attendee's camera features (torch, camera switching)
- Pause the video stream when needed
- View location data if enabled
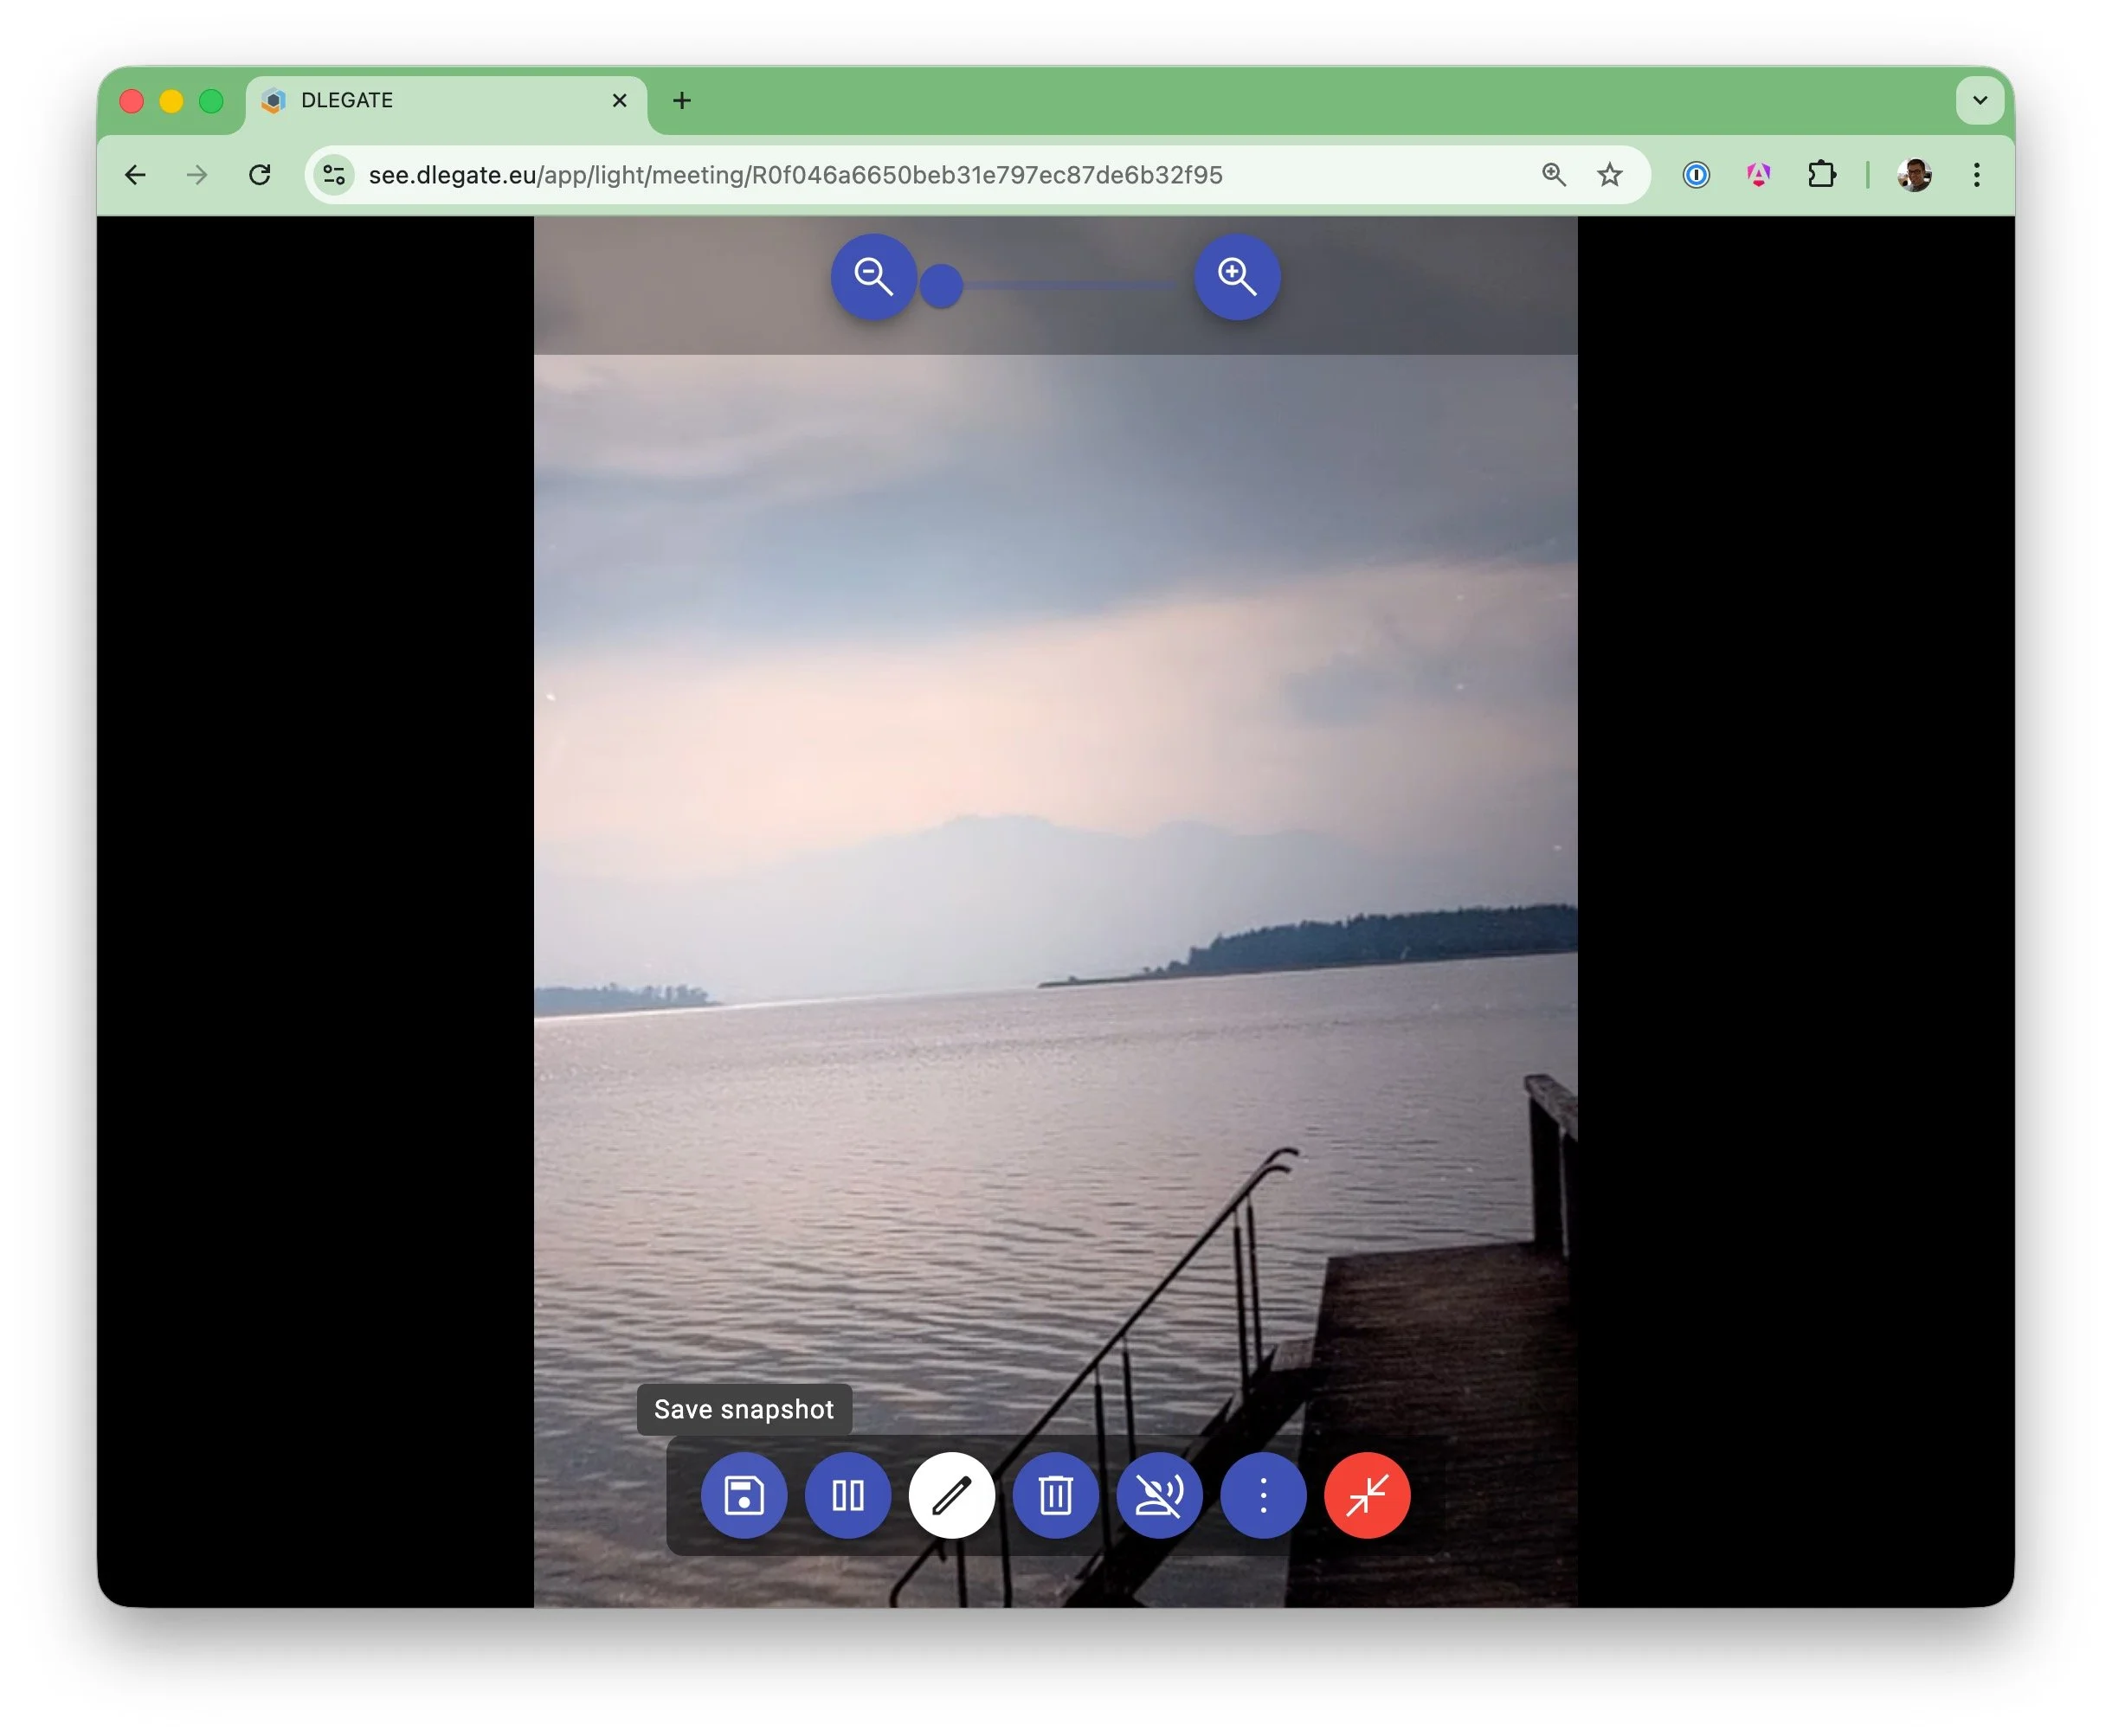
7Capture Evidence
Capture high-resolution snapshots during the inspection whenever you identify relevant details.
- Capture high-resolution snapshots from the video stream
- All captured images automatically stored in the session gallery
8Annotate Live
Pause the video and use the annotation tools to highlight specific details directly on the live image feed. The other party sees these on their device too.
- Draw or mark areas directly on the video frame
- Participants see annotations in real time

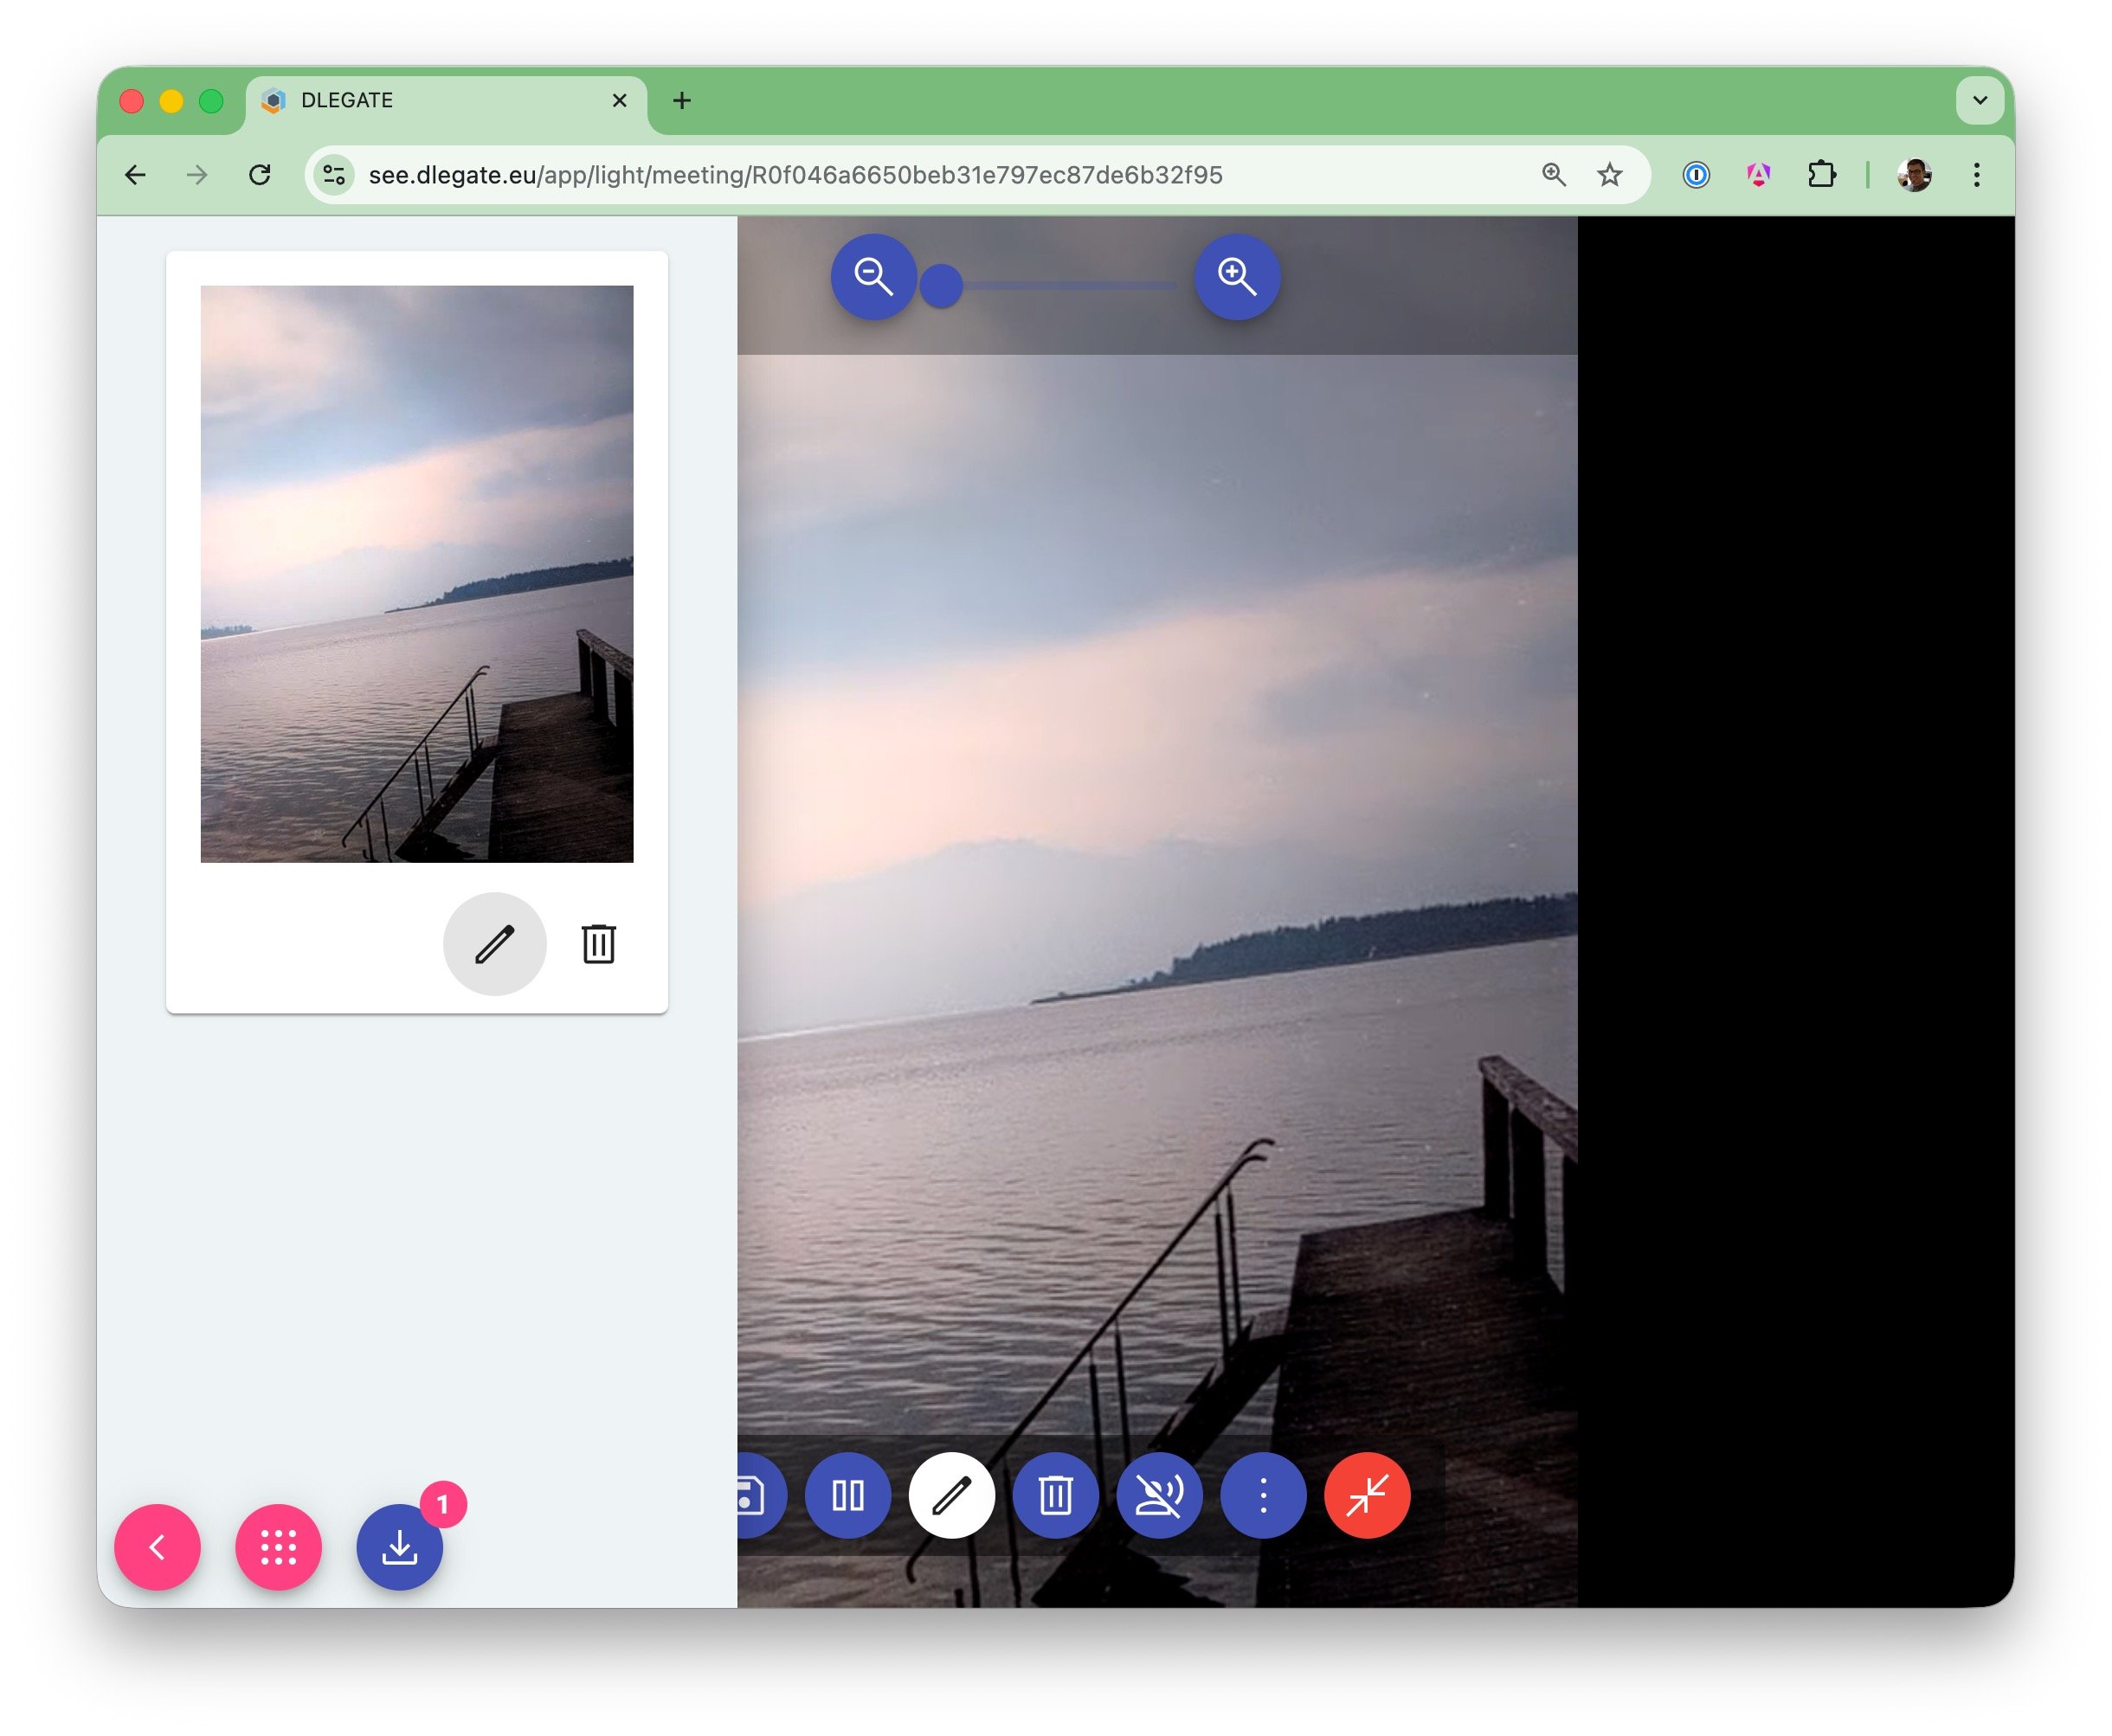
9Manage your Captures
Your captured and annotated snapshots are automatically gathered in a side panel. You can easily review, delete, or download them to your local device individually.
- View captured images in the session gallery
- Delete or download individual images
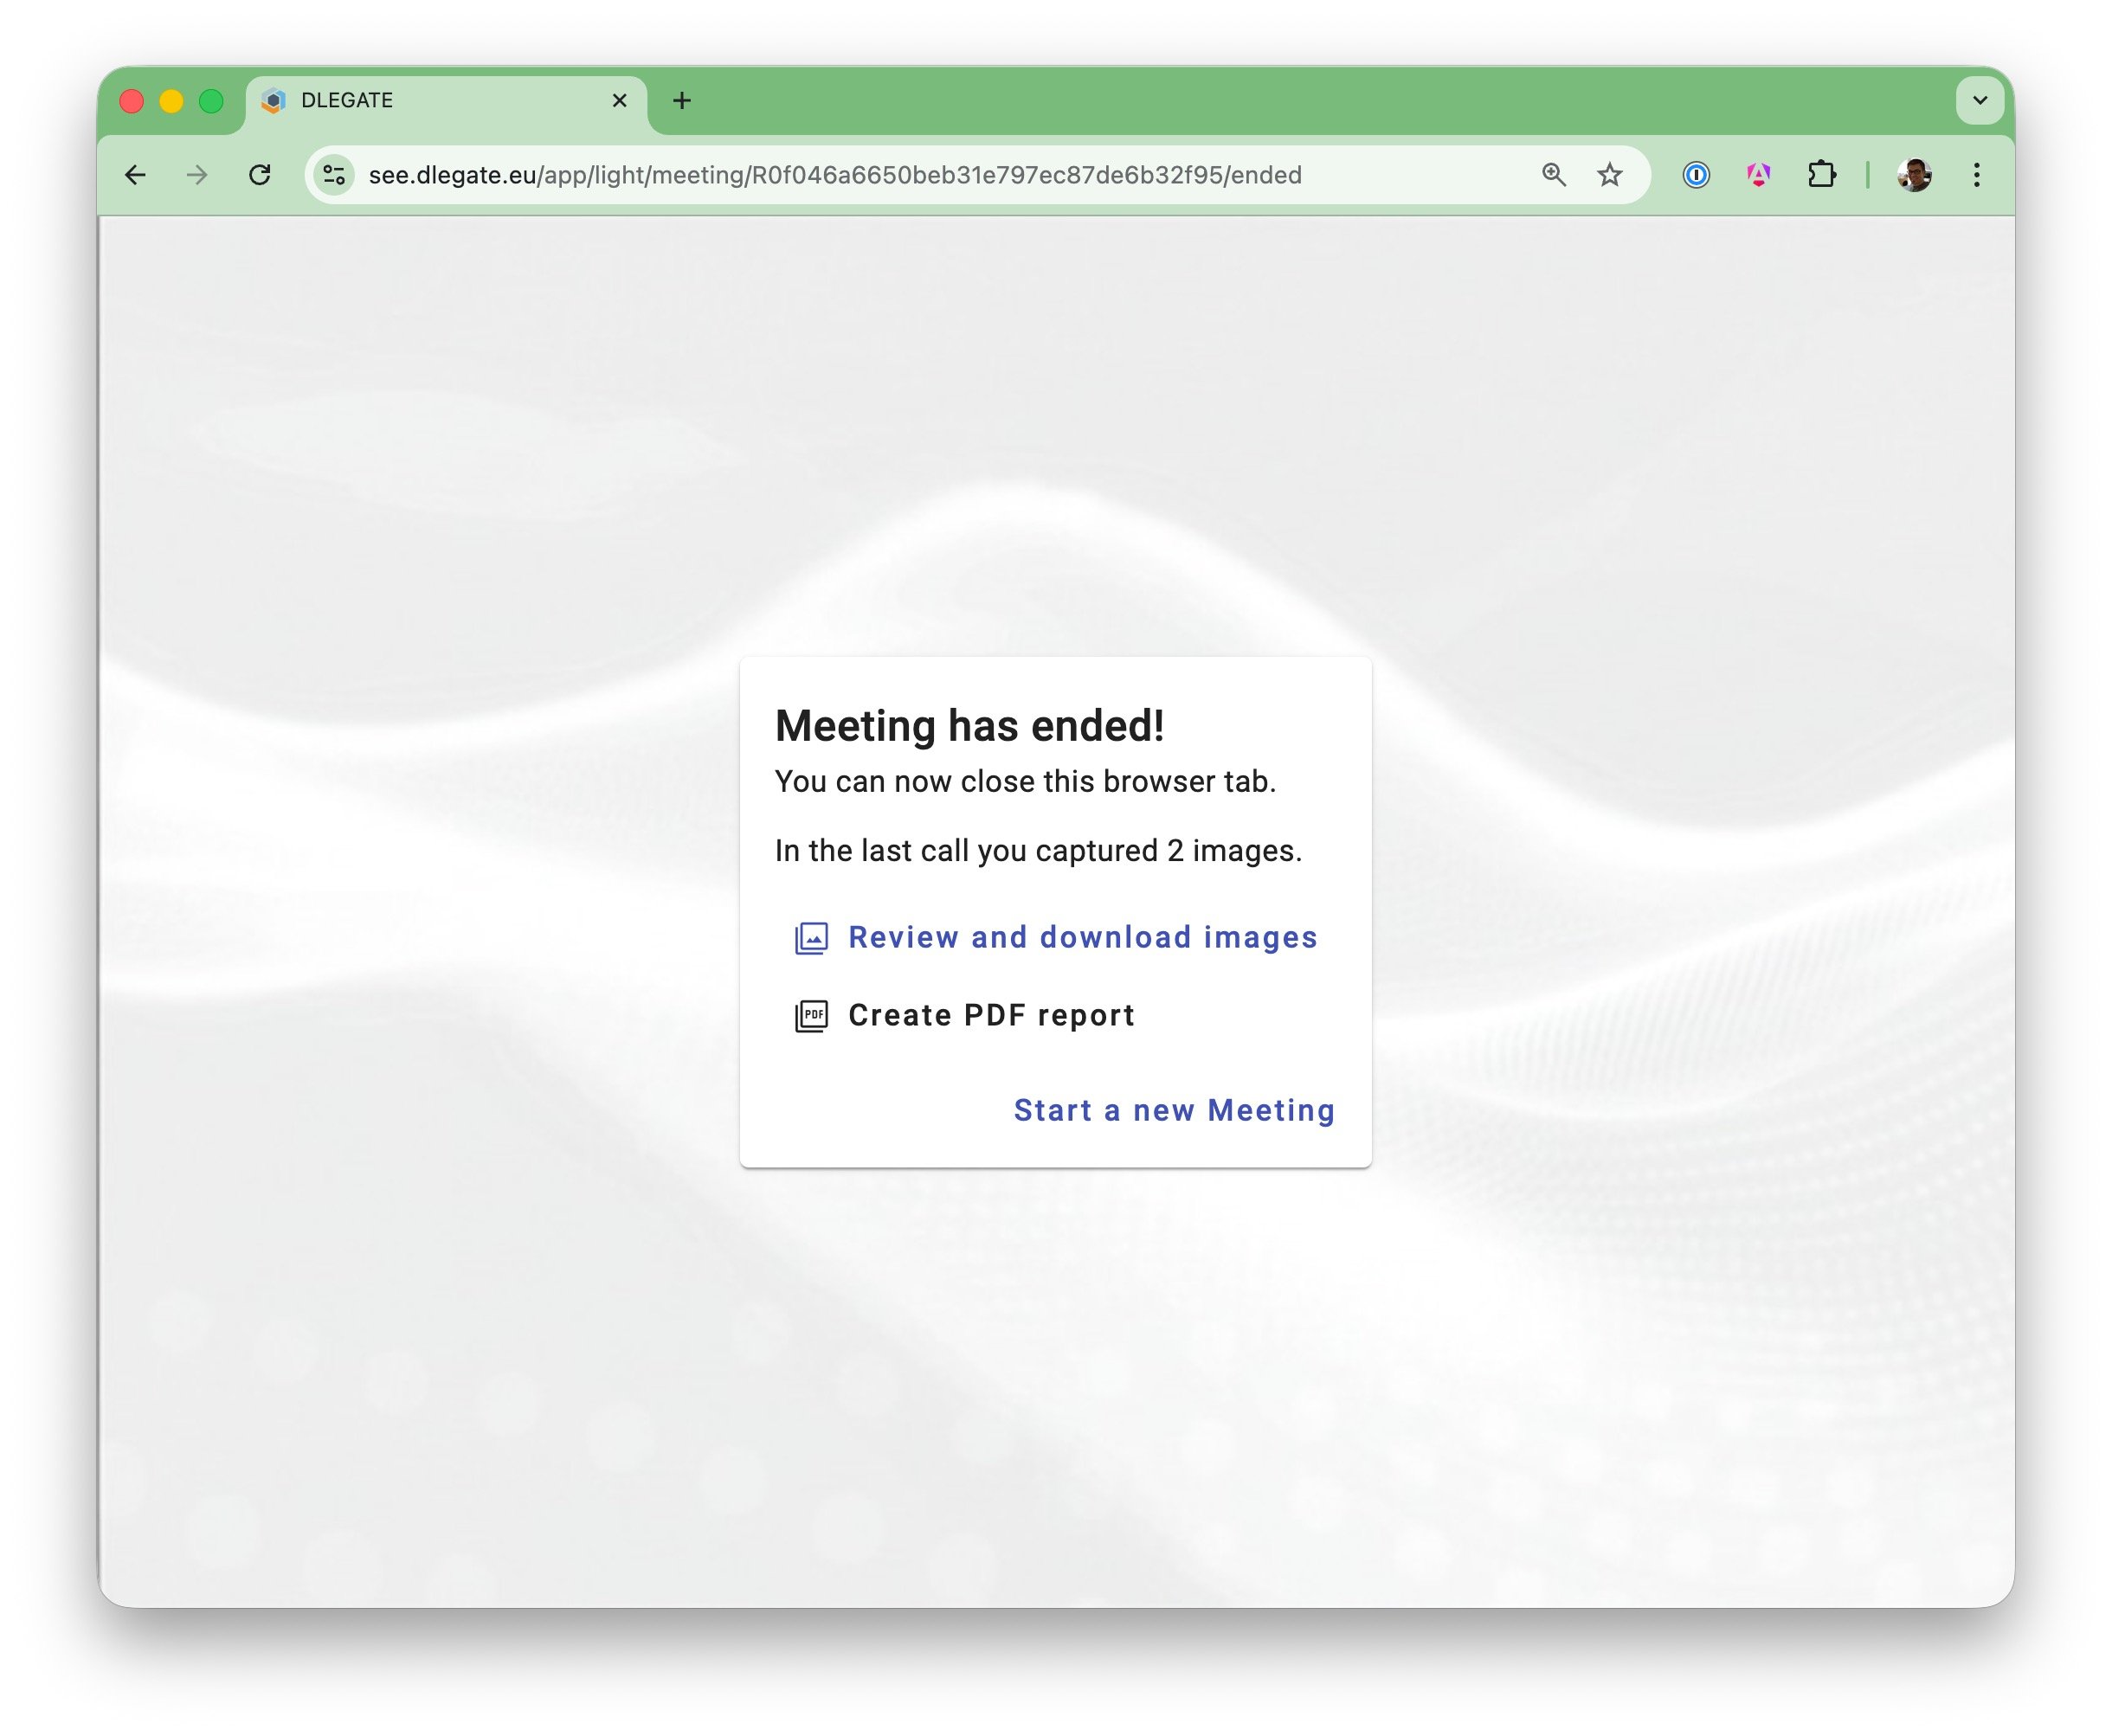
10End the Session
When the inspection is complete, end the session. You can smoothly disconnect and exit inspection mode.
- End the call for all attendees
- Captured evidence remains available after the session
11Generate Reports
After the session ends, you can generate a structured report containing all captured images and annotations.
- Generate a PDF report with one click
- Bulk download of all captured images